An example of how to build a driver using CM Connect IoT, for a very popular driver. All the source code of this driver is available here.
Overview#
AMQP 1.0 is a very common open standard in the world of enterprise messaging and distributed systems. It was designed to allow different applications, services, and devices to communicate using a reliable, interoperable messaging protocol.
Unlike vendor-specific solutions, AMQP 1.0 is vendor agnostic and topology agnostic — meaning it does not assume a specific messaging model (like queues or topics). Instead, it defines a standard way to move messages over the network, leaving the broker or router to decide how to store, route, or fan-out those messages.
This makes AMQP 1.0 perfect for cloud platforms, hybrid systems, and microservice architectures where components need to talk to each other in a reliable way without being tightly coupled.
It is a key part of the cloud-native messaging ecosystem and is increasingly popular in Industry 4.0 and IoT solutions because it works across vendors and technology stacks.
AMQP 1.0 is designed around a network of nodes rather than a centralized queue model. This means any node can send messages directly to any other node — enabling peer-to-peer, brokerless, or broker-mediated communication depending on how your system is deployed.
- Interoperability – Any AMQP 1.0 client can talk to any AMQP 1.0 broker or peer.
- Reliability – Supports at-least-once, at-most-once, and exactly-once message delivery.
- Backpressure & Flow Control – Built-in credit-based mechanism to avoid overloading consumers.
- Security – TLS encryption and SASL/OAuth2 authentication are built in.
- Flexibility – Works for queues, topics, pub/sub, RPC, and streaming use cases.
Architecture#
AMQP 1.0 follows a connection–session–link model.
Client ↔ Connection ↔ Session ↔ Link ↔ Node (Queue/Topic)
Let’s break it down step by step:
Client– The application that sends or receives messages. This could be a microservice, an IoT gateway, or a backend service.Connection– A persistent, secure TCP (or TLS) connection between the client and the broker.Session– A virtual channel inside the connection, allowing multiple streams of messages to coexist independently.Link– The logical path to send or receive messages. Links are unidirectional — there are sender links (for producing messages) and receiver links (for consuming messages).Node– An addressable endpoint in the network (queue, topic, service endpoint, or even another client).
In AMQP 1.0, a node can be:
A queue or topic in a broker. A dynamic node created on demand (temporary queue). Another client acting as a message endpoint.
This means you can have:
- Brokerless peer-to-peer messaging — clients communicate directly if they know each other’s address.
- Routed topologies — with intermediaries forwarding messages between nodes.
- Classic brokered queues/topics — if that’s what your architecture requires.
This makes AMQP 1.0 much more flexible than protocols that force you into a broker-and-queue model.
Communication Flow#
The typical flow of a messaging session in AMQP 1.0 looks like this:
- Open a Connection - The client connects to the broker and performs any authentication (e.g., SASL, TLS).
- Begin a Session - The client opens a session to group message exchanges.
- Attach a Link - The client declares whether it wants to send (producer) or receive (consumer) messages for a specific address (queue, topic, etc.).
- Grant Credits - The receiver tells the sender how many messages it is ready to accept — this is flow control to prevent overload.
- Transfer Messages - The sender transmits messages. Each message has metadata (headers, properties) and a payload (the actual data).
- Acknowledge Messages - The receiver accepts, rejects, or releases messages. This is how AMQP ensures messages are delivered reliably.
- Detach and Close - When done, links are detached, sessions ended, and the connection closed cleanly.
Message Routing#
Because any node can send to any node, AMQP 1.0 supports multiple topologies:
- Point-to-Point – One producer sends to one consumer.
- Publish/Subscribe – Multiple consumers can receive the same message.
- Request/Reply – Direct RPC-like communication between services.
- Mesh or Bus – Nodes exchange messages with each other without a central broker.
AMQP Message#
An AMQP 1.0 message has a flexible, structured format:
- Header – TTL, durability, priority
- Properties – message ID, correlation ID, reply-to
- Application Properties – user-defined key-value metadata
- Body – the actual payload (binary, JSON, text, etc.)
This makes AMQP messages self-describing, which helps with routing, filtering, and debugging.
Building a Connect IoT Driver#
For our example we will use the simplest form of AMQP.
A driver that is a publisher of messages to a broker. In further blogs we will address other facets of AMQP, like subscribing to the Broker and being able to receive and send Peer-to-Peer messages.
One of the first decisions in any driver is what tools do you require to build driver support. For most drivers the starting point is made easy by the availability of SDKs or other tools made available by vendors or foundations. AMQP is an open standard and has support across different programming languages and engines.
We will use a very common nodejs library rhea. Rhea is a pure javascript library to interface with amqp.
Scaffolding a Driver#
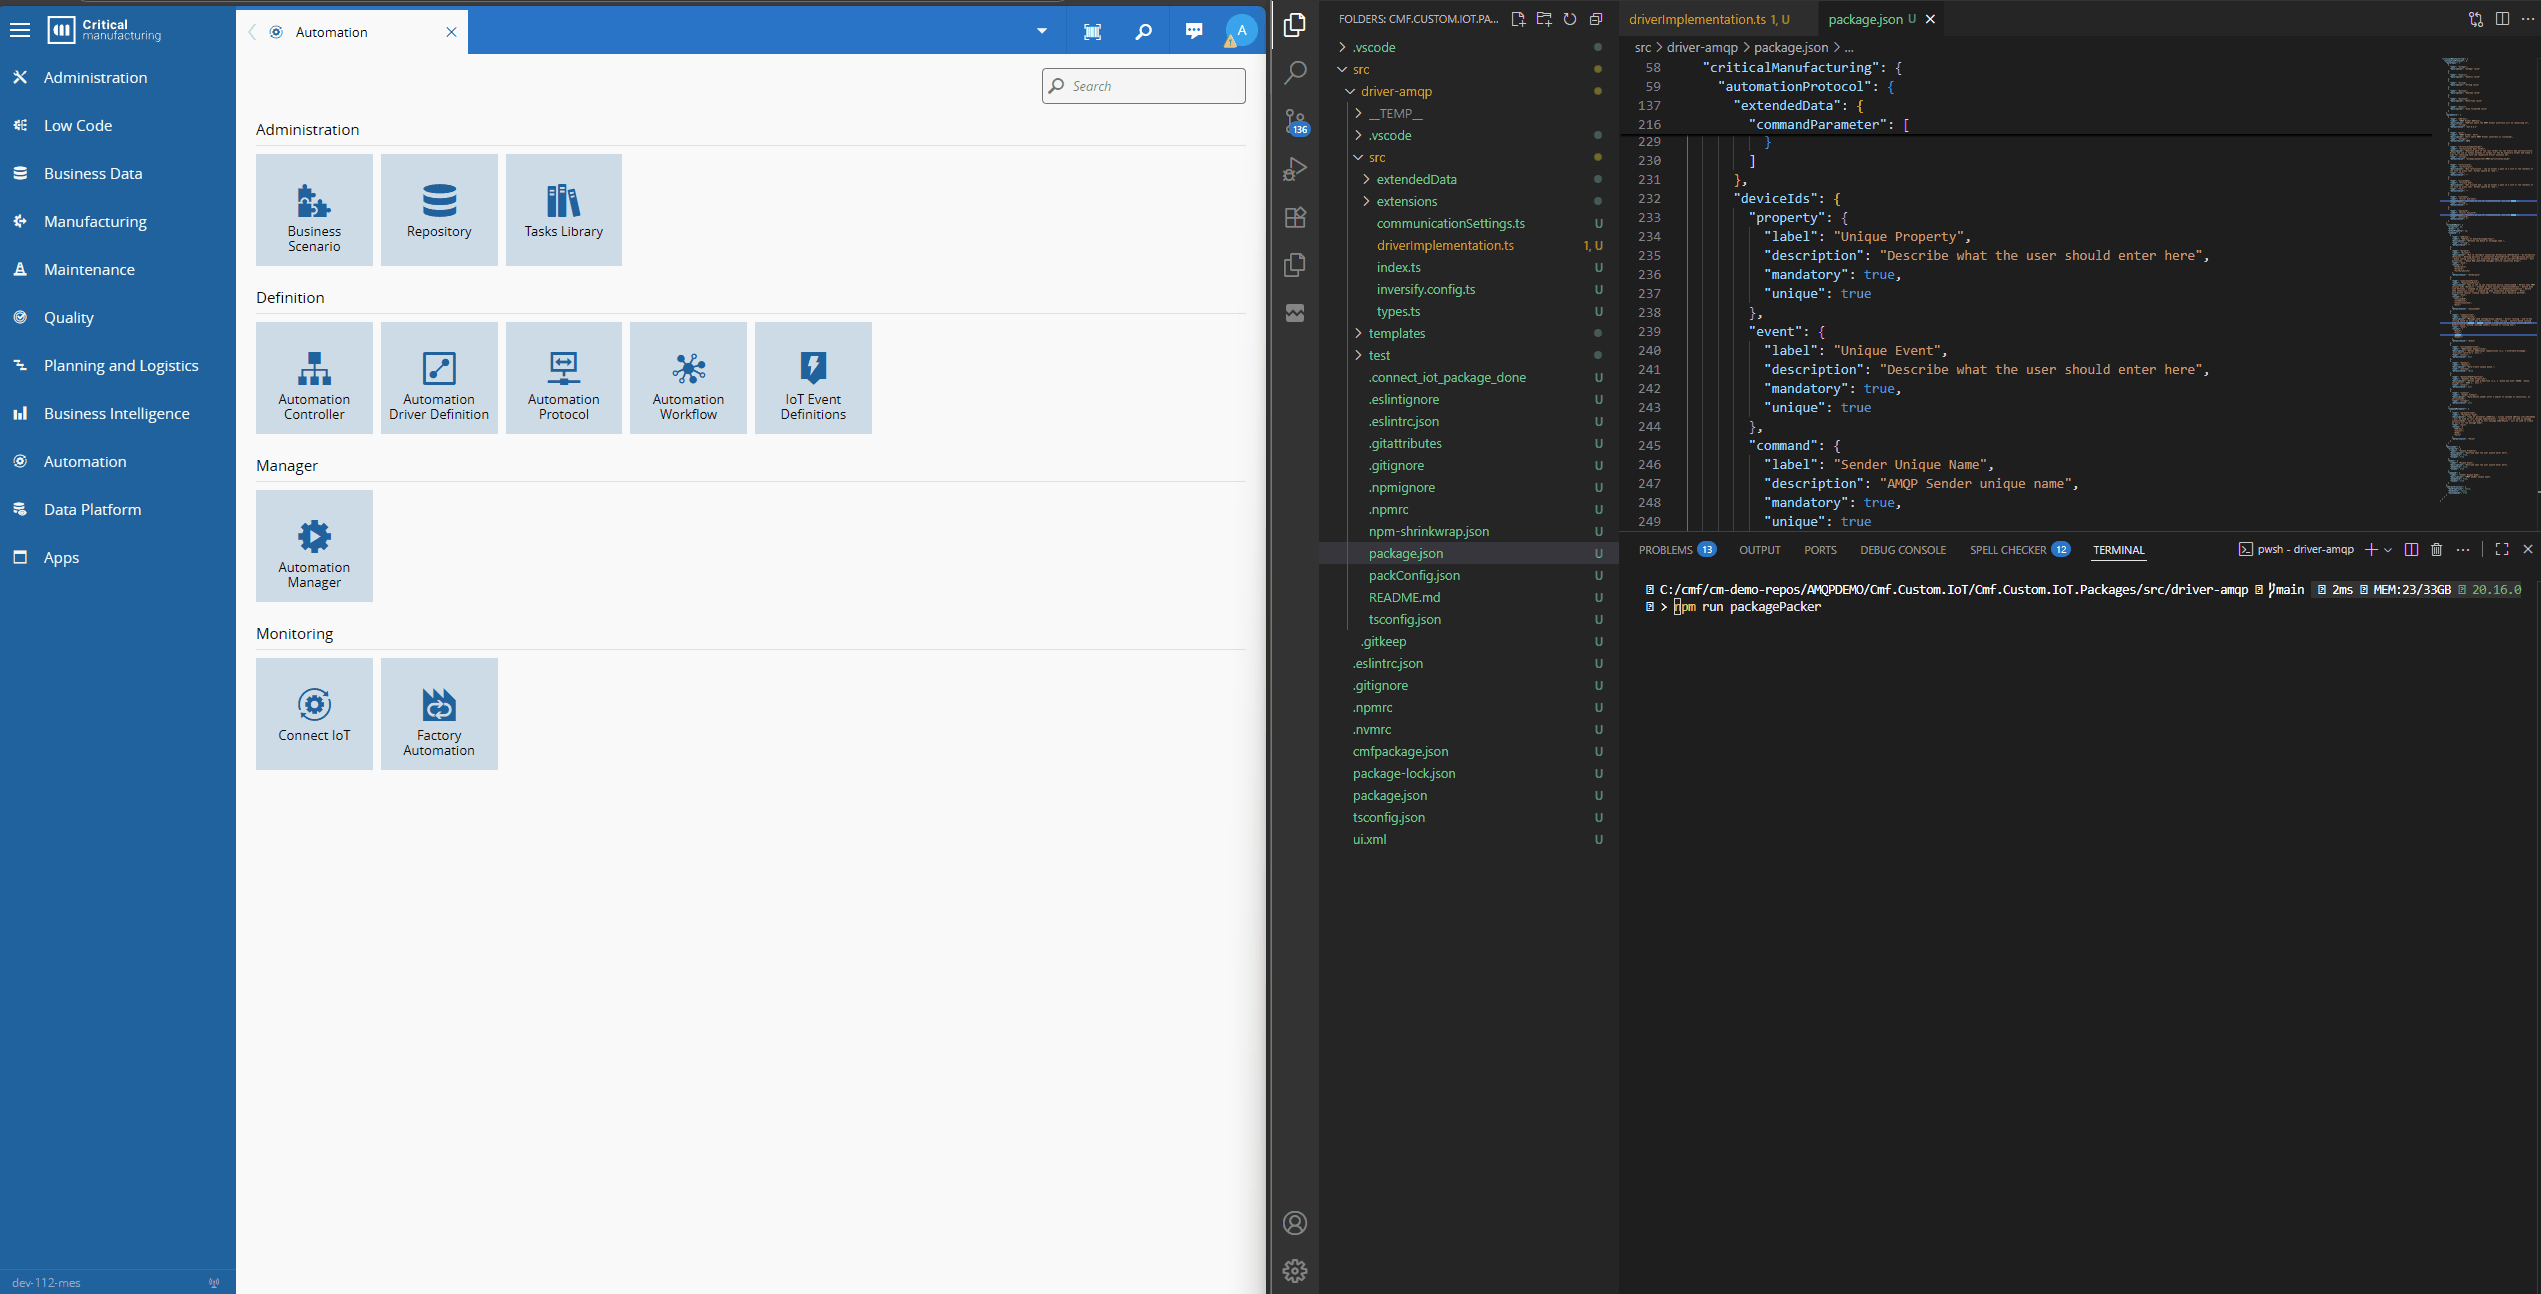
The Connect IoT Driver is a component of a customization package for Connect IoT. In a CM customization project workspace, let’s create a cmf new iot package.
Right away the scaffolding helps us a lot, by giving us a solution where we can create our interface with AMQP. We have already a driver skeleton, that is buildable has linting and runs tests.
The scaffolding already provides a full on buildable and packable solution. In order to interact with the driver we can use the same commands that will be used by the pipeline to create a package with cmf build and cmf pack.
We can also decompose them into their subcommands.
With npm i to install the npm packages, npm run build to build the code, npm run test to test the code and npm run packagePacker to create a .tgz file with the driver bundled. Additionally, we also have support for the use of watchers that continuously build the code on changes, like npm run watchPackage, with this after every change to your source code, the code will automatically compile.
We are using npm workspaces. Commands in the root workspace will invoke commands in each package. We can see how we can build in the root, in the package itself, how we can generate an IoT package and how we can have the terminal continuously building our driver.
Defining our Settings for the UI#
A good place to start the driver development is to start defining what are the settings the user will need to interact with.
For the driver, we will need:
- address - ip or hostname of the AMQP Broker
- port - port of the Broker
- username - username for the user defined in the Broker
- password - password for the user defined in the Broker
- certificate - content of the certificate to pass on to the AMQP Broker
- privateKey - content of the private key to pass on to the AMQP Broker
In order for these settings to be available in the UI, we will need them to be part of our driver package.json. The json will be imported to the UI when creating a protocol and dynamically generate the required fields.
"parameters": [
  {
    "name": "address",
    "label": "AMQP Broker Address",
    "description": "Address where the AMQP Broker interface will be connecting to",
    "type": "string",
    "defaultValue": "127.0.0.1"
  },
  {
    "name": "port",
    "label": "AMQP Broker  Port",
    "description": "Port where AMQP Broker interface is listening",
    "type": "integer",
    "defaultValue": 5672
  },
  {
    "name": "certificatesRootFolder",
    "label": "Certificates Root Folder",
    "description": "Absolute path of the root folder for the Public Key Infrastructure. Allows the use of tokens ${temp} or ${tmp} for the OS temporary folder and token ${id} for replacing with the respective driver instance id",
    "type": "string",
    "defaultValue": "${temp}/ConnectIoT/AMQP/Certificates/${id}"
  },
  {
    "name": "certificate",
    "label": "Certificate",
    "description": "Own certificate - can be either a path to a file or the contents of the file in plain text. Format should be 'pem'",
    "type": "text",
    "defaultValue": ""
  },
  {
    "name": "privateKey",
    "label": "Private Key",
    "description": "Own private key - can be either a path to a file or the contents of the file in plain text. Format should be 'pem'",
    "type": "text",
    "defaultValue": ""
  },
  {
    "name": "username",
    "label": "Driver Username",
    "description": "Username to use for authentication. Use with amqps.",
    "type": "string",
    "defaultValue": ""
  },
  {
    "name": "password",
    "label": "Driver Password",
    "description": "Password to use for authentication. Use with amqps.",
    "type": "password",
    "defaultValue": ""
  }
]
From analyzing the Protocol and rhea we can also see what are the required settings for our publishing commands.
We will support dynamically overriding the default address of the command (i.e the topic or queue name).
Then we will have settings relevant for our sender connection. The Capabilities will be the setting responsible for telling the broker how to interpret the message.
Your broker may support additional capabilities, you can use the extraCapabilities to add more.
"command": [
  {
    "name": "address",
    "label": "Address of Queue/Exchange/Topic",
    "description": "Defines the Queue or Exchange name.",
    "type": "string",
    "defaultValue": ""
  },
  {
    "name": "durable",
    "label": "Durable",
    "description": "How to configure connection durability.\nNotDurable - No durability (default) - Nothing persists if connection drops\nDurable - Configuration persists - Queue config survives, but unsettled messages may be lost\nFullDurability - Full durability  - Queue AND unsettled messages survive connection drops",
    "type": "enum",
    "values": [
      "NotDurable",
      "Durable",
      "FullDurability"
    ],
    "defaultValue": "NotDurable"
  },
  {
    "name": "expirationPolicy",
    "label": "ExpirationPolicy",
    "description": "How to set up the expiration policy.\nSessionEnd - Delete when AMQP session ends (default) - Cleaned up when session closes\nLinkDetach - Delete when link detaches - Cleaned up when sender.close() called\nConnectionClose - Delete when connection closes  - Cleaned up when connection drops\nNever - Never auto-delete (manual cleanup required)  - Persists until manually deleted",
    "type": "enum",
    "values": [
      "SessionEnd",
      "LinkDetach",
      "ConnectionClose",
      "Never"
    ],
    "defaultValue": "SessionEnd"
  },
  {
    "name": "capabilities",
    "label": "Capabilities",
    "description": "Message send configuration.\nQueue - Direct routing - one-to-one routing based on exact key match\nTopic - Topic routing - pattern-based routing with wildcards\nFanout - Fanout routing - broadcast to all bound queues\nHeaders - Headers-based routing (message headers instead of routing key)",
    "type": "enum",
    "values": [
      "Queue",
      "Topic",
      "Fanout",
      "Headers"
    ],
    "defaultValue": "Queue"
  },
  {
    "name": "extraCapabilities",
    "label": "Additional Capabilities",
    "description": "Define additional capabilities (i.e. ['alternate-exchange', 'publisher-confirms'], etc).",
    "type": "object",
    "defaultValue": null
  },
  {
    "name": "dynamic",
    "label": "Dynamic",
    "description": "Auto-create unique queue.",
    "type": "boolean",
    "defaultValue": false
  },
  {
    "name": "dynamicNodeProperties",
    "label": "Dynamic Node Properties",
    "description": "Define node properties (i.e. { 'queue.max-size':10000, 'queue.message-ttl': 6000 },  etc).",
    "type": "object",
    "defaultValue": null
  },
  {
    "name": "timeout",
    "label": "Sender Timeout",
    "description": "Auto-delete sender after X amount of seconds of inactivity, in milliseconds",
    "type": "integer",
    "defaultValue": null
  }
]
As our driver will be only an AMQP publisher we will only require commands. In the package.json we can disable the events and properties from the driver definition and give a friendly name to the deviceId.
"deviceIds": {
  "property": {
    "label": "Unique Property",
    "description": "Describe what the user should enter here",
    "mandatory": true,
    "unique": true
  },
  "event": {
    "label": "Unique Event",
    "description": "Describe what the user should enter here",
    "mandatory": true,
    "unique": true
  },
  "command": {
    "label": "Sender Unique Name",
    "description": "AMQP Sender unique name",
    "mandatory": true,
    "unique": true
  }
},
"characteristics": {
  "hasProperties": false,
  "hasEvents": false,
  "hasCommands": true
}
After defining our package.json we can already create a package with this skeleton and uploaded it to the MES UI.
In the UI we are able to create an Automation Protocol with all our communication settings.
cmf pack will create an installable package that will deploy the AMQP driver..Defining our Settings for the Driver#
The package.json will describe the visualization settings for the UI, we can now define them for our driver.
In the communicationSettings.ts we can now declare our settings.
export interface AMQPCommunicationSettings {
    // Add driver specific settings here
    address: string,
    port: number,

    // Common/driver WS settings
    heartbeatInterval: number;
    setupTimeout: number;
    intervalBeforeReconnect: number;
    connectingTimeout: number;

    /** ********** Security ********** */
    username: string;
    password: string;
    /** Certificates root folder */
    certificatesRootFolder: string;
    /** Certificate to use for communication */
    certificate: string;
    /** Certificate's private key */
    privateKey: string;
}

/** Default Communication Settings */
export const aMQPDefaultCommunicationSettings: AMQPCommunicationSettings = {
    // Add driver specific default settings here
    address: "127.0.0.1",
    port: 5671,

    // Common/driver WS settings
    heartbeatInterval: 30000,
    setupTimeout: 10000,
    intervalBeforeReconnect: 5000,
    connectingTimeout: 30000,

    /** ********** Security ********** */
    username: "",
    password: "",
    /** EndPoint certificates root folder for amqps*/
    certificate: "",
    /** EndPoint certificate to use for communication for amqps*/
    certificatesRootFolder: "${tmp}/ConnectIoT/AMQP/Certificates/${id}",
    /** EndPoint certificate's private key for amqps*/
    privateKey: "",
};
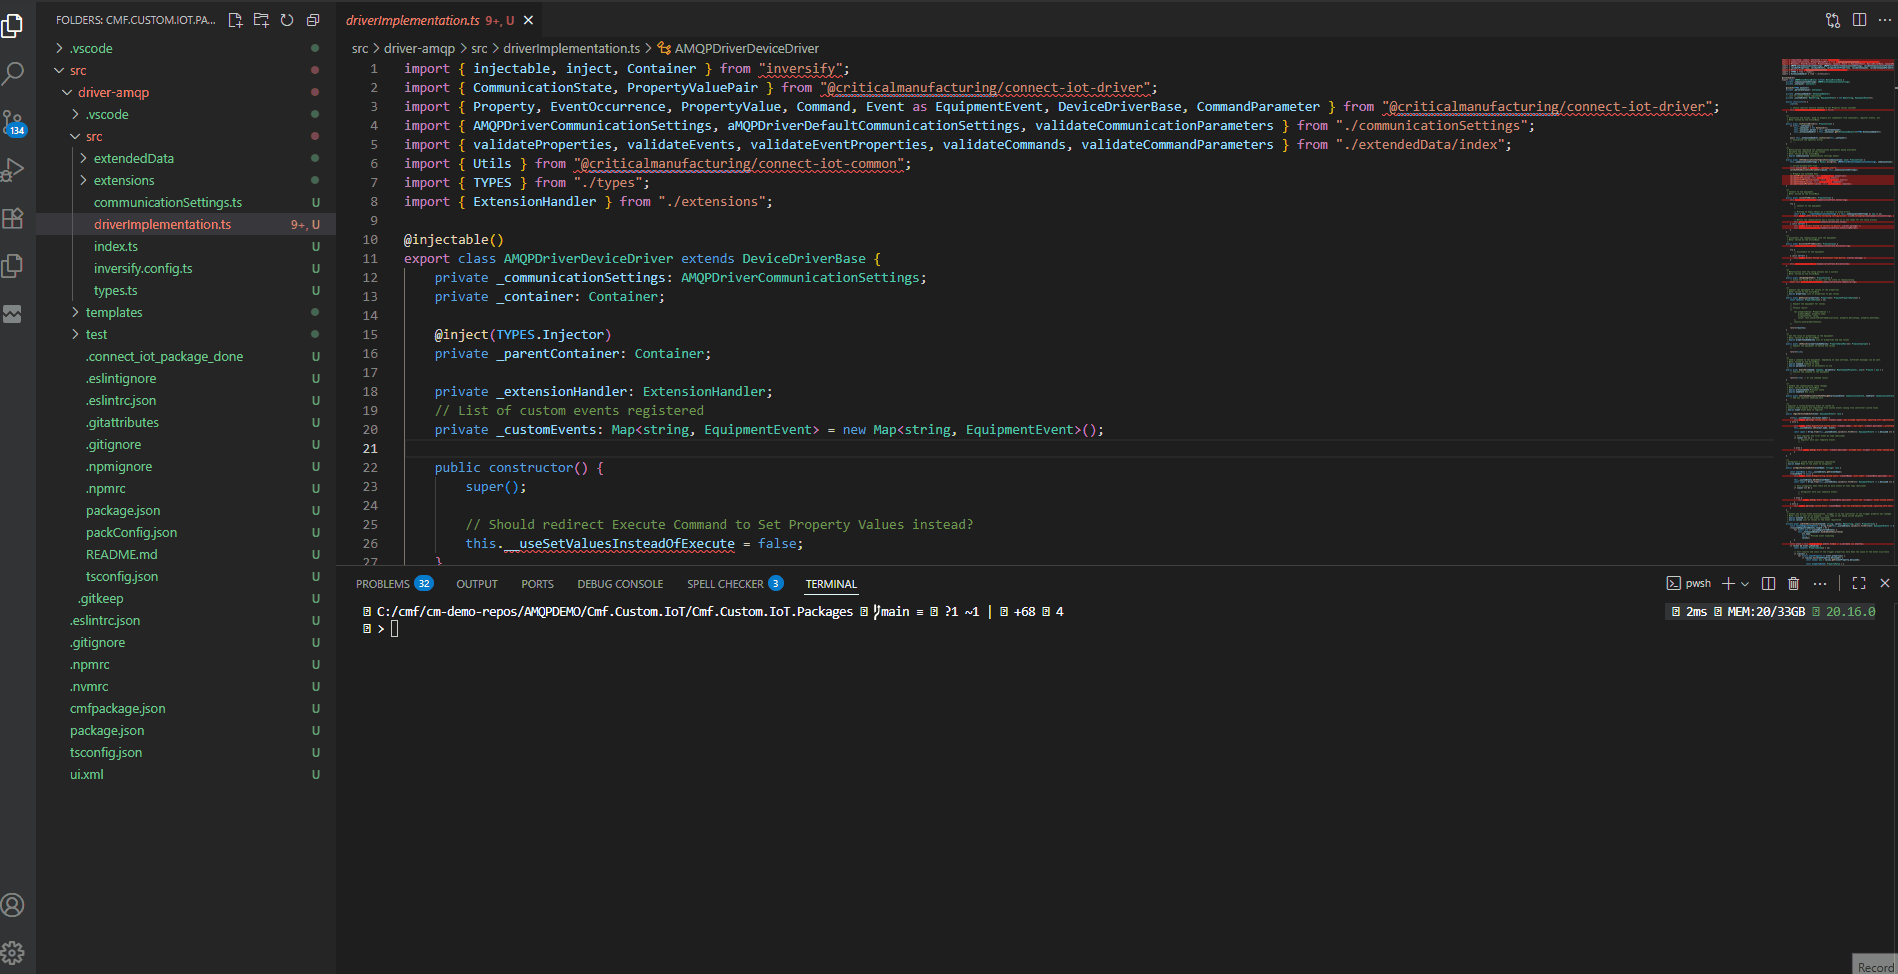
Driver Implementation#
The driver implementation is a key part of our driver. In the driver implementation we will focus on some key methods.
Set Communication Configurations#
When the setCommunicationConfiguration is invoked in the lifecycle of the driver it will reconcile what was defined in the task Equipment Configuration, the package.json and the communication settings.
/**
  * Notification regarding the communication parameters being available.
  * Validate the integrity of the values
  * Note: Called by the driverBase
  * @param communication Communication settings object
  */
public async setCommunicationConfiguration(communication: any): Promise<void> {
    this._communicationSettings = Object.assign({}, aMQPDefaultCommunicationSettings, communication);

    // eslint-disable-next-line
    const pJson = require("../package.json");
    validateCommunicationParameters(pJson, this._communicationSettings);

    // Prepare the extended data
    validateCommands(pJson, this.configuration.commands);
    validateCommandParameters(pJson, this.configuration.commands);

    this.manageCertificates();
}
Our implementation requires the use of certificates. In the setCommunicationConfiguration we will setup our certificates.
This method will retrieve the templated folder for the certificates. Will retrieve the certificate content and store it in a file locally.
Connect#
As we stated in the overview we will be using rhea as our main library for AMQP interactions.
The connect is split into three main parts.
The first part is responsible for building a configuration object, the second part is creating a new amqp connection using rhea, the last part is creating event listeners for errors.
/**
 * Connect to the equipment.
 * Note: Called by the driverBase
 */
public async connectToDevice(): Promise<void> {
    this.setCommunicationState(CommunicationState.Connecting);

    try {

      // #region 1. Create Connection Object
        const connectionConfig: any = {
            host: this._communicationSettings.address,
            port: this._communicationSettings.port
        };

        // Add TLS if certificates are provided
        if (this._communicationSettings.certificate) {
            connectionConfig.transport = "tls";
            connectionConfig.key = fs.readFileSync(this._privateKeyFile);
            connectionConfig.cert = fs.readFileSync(this._certificateFile);
        }

        // Add credentials if provided
        if (this._communicationSettings.username && this._communicationSettings.password) {
            connectionConfig.username = this._communicationSettings.username;
            connectionConfig.password = this._communicationSettings.password;
        }
        // #endregion

        // #region 2. Connect to AMQP Broker
        this._amqpConnection = rhea.connect(connectionConfig);
        // #endregion

        // #region 3. Register Event Listeners for errors
        this._amqpConnection.on("connection_error", async (context) => {
            if (!this._isDisconnecting) {
                this._isDisconnecting = true;
                this.logger.error(`There was a connection error '${context?.error?.message}', will disconnect.`);
                this.setCommunicationState(CommunicationState.ConnectingFailed);
                this.disconnect();
            }
        });

        this._amqpConnection.on("disconnected", async (context) => {
            if (!this._isDisconnecting) {
                this._isDisconnecting = true;
                this.logger.error(`Disconnected from Broker '${context?.error?.message ?? JSON.stringify(context?.error?.errors ?? "")}', will force disconnect.`);
                this.setCommunicationState(CommunicationState.Disconnected);
                this.disconnect();
            }
        });
        // #endregion

        // Provide an empty object as a fallback to avoid errors
        const { $id, ...cleanCommunicationSettings } = this._communicationSettings as any || {};
        this.logger.info(`Using the following configurations: ${JSON.stringify(cleanCommunicationSettings, undefined, " ")}`);

        // Wait for Connection to Open
        await AMQPDeviceDriver.waitFor(this.connectingTimeout, `Connection was never opened`, () => (this._amqpConnection?.is_open() ?? false) && !this._isDisconnecting);

        // Notify the communication was a success and it is now ready for the setup process
        this.setCommunicationState(CommunicationState.Setup);
    } catch (error) {
        this.logger.error(`Failed to connect to device: ${error.message}`);
        this.setCommunicationState(CommunicationState.ConnectingFailed);
    }
}
After finishing the connection cycle, the driver will be available to create sender links.
Disconnect#
The disconnect will make sure to clean all the elements of the driver that were instantiated in the start cycle.
/**
 * Disconnect the communication with the equipment
 * Note: Called by the driverBase
 */
public async disconnectFromDevice(): Promise<void> {
    this.setCommunicationState(CommunicationState.Disconnecting);

    try {
        this._amqpConnection.close();
    } catch (error) {
        this.logger.error(`Failed to disconnect from device: ${error.message}`);
    }
    this._isDisconnecting = false;
    this.setCommunicationState(CommunicationState.Disconnected);
}
Execute Command#
This driver is focused on publishing messages to an amqp broker. The driver will have only commands. The goal of the execute method will be to translate the command as defined in the driver definition and then as filled in the controller workflow into a send request for AMQP. The execute, will receive a command. It will check if the command address has ever had a sender link created. In order to do this, due to the ability to provide dynamic addresses it will create a hash value that joins the command name with an address. If the sender link doesn’t already exist, it will create a new sender link. It will wait for the sender link to be sendable and will then perform a sender request.
public async execute(command: Command, parameters: Map<CommandParameter, any>): Promise<any> {

    // Safeguard against publish commands before connecting
    if (!this._amqpConnection || !this._amqpConnection.is_open()) {
        this.logger.warning("Driver is not ready, will ignore execute");
        return;
    }

    // Parse command and command parameters
    const { parameterAddress, commandOptions, body, subject }: { parameterAddress: string; commandOptions: CommandExtendedData; body: Record<string, any>; subject: string | undefined; } = this.parseCommandParameters(command, parameters);

    // #region Retrieve/Create sender
    const uniqueIdentifier = createHash("sha256").update((command.deviceId + "_" + parameterAddress)).digest("hex");
    let sender = this._amqpConnection.find_sender((s: Sender) => s.name === uniqueIdentifier);

    if (!sender) {
        sender = this.registerNewSender(sender, commandOptions, uniqueIdentifier, parameterAddress, command);
    }

    if (sender?.sendable() ?? false) {
        await AMQPDeviceDriver.waitFor(10,
            `Sender never became sendable '${command.deviceId}' address '${parameterAddress}' '${uniqueIdentifier}'`,
            () => sender?.sendable() ?? false);
    }
    // #endregion

    sender.send({
        body: JSON.stringify(body),
        content_type: "application/json",
        content_encoding: "utf-8",
        subject,
        message_id: Date.now().toString(),
        creation_time: new Date()
    });

    return (true);
}
The registerNewSender method is responsible for creating a new sender link and also to create listeners to monitor the health of the sender. It will provide visibility to the user if there is any issue in the lifecycle of the sender link.
private registerNewSender(sender: rhea.Sender | undefined, commandOptions: CommandExtendedData, uniqueIdentifier: string, parameterAddress: string, command: Command) {
    const capabilities: string[] = [commandOptions.capabilities, ...commandOptions.extraCapabilities ?? []];

    sender = this._amqpConnection.open_sender({
        name: uniqueIdentifier,
        target: {
            address: parameterAddress,
            durable: commandOptions.durable?.valueOf(),
            expiry_policy: commandOptions.expirationPolicy,
            dynamic: commandOptions.dynamic,
            dynamic_node_properties: commandOptions.dynamicNodeProperties,
            capabilities: capabilities ?? [],
            timeout: commandOptions.timeout,
        }
    });

    sender.on("sender_open", () => {
        this.logger.debug(`Sender opened: command '${command.deviceId}' address '${parameterAddress}' '${uniqueIdentifier}'`);
    });

    sender.on("rejected", (context) => {
        this.logger.warning(`Sender rejected: command '${command.deviceId}' address '${parameterAddress}' '${uniqueIdentifier}'`);
    });

    sender.on("sendable", () => {
        this.logger.debug(`Sender sendable: command '${command.deviceId}' address '${parameterAddress}' '${uniqueIdentifier}'`);
    });

    sender.on("sender_error", (context) => {
        this.logger.error(`Sender error: command '${command.deviceId}' address '${parameterAddress}' '${uniqueIdentifier}' - '${JSON.stringify(context?.sender?.error ?? "")}'`);
    });

    return sender;
}
With this simple methods we now have a working AMQP publisher driver.
Running It#
Now that we finished our driver we can see it working.
Download and Run#
First, let’s generate a new package driver and create a driver definition and an automation controller.
We are able to create a new Driver Definition. This is our contract interface between the controller and driver.
Our interface is very simple.
We will have one command called Queue Command, this command will have two parameters. One parameter will allow for the address of the queue and the other will receive the payload of the command body.
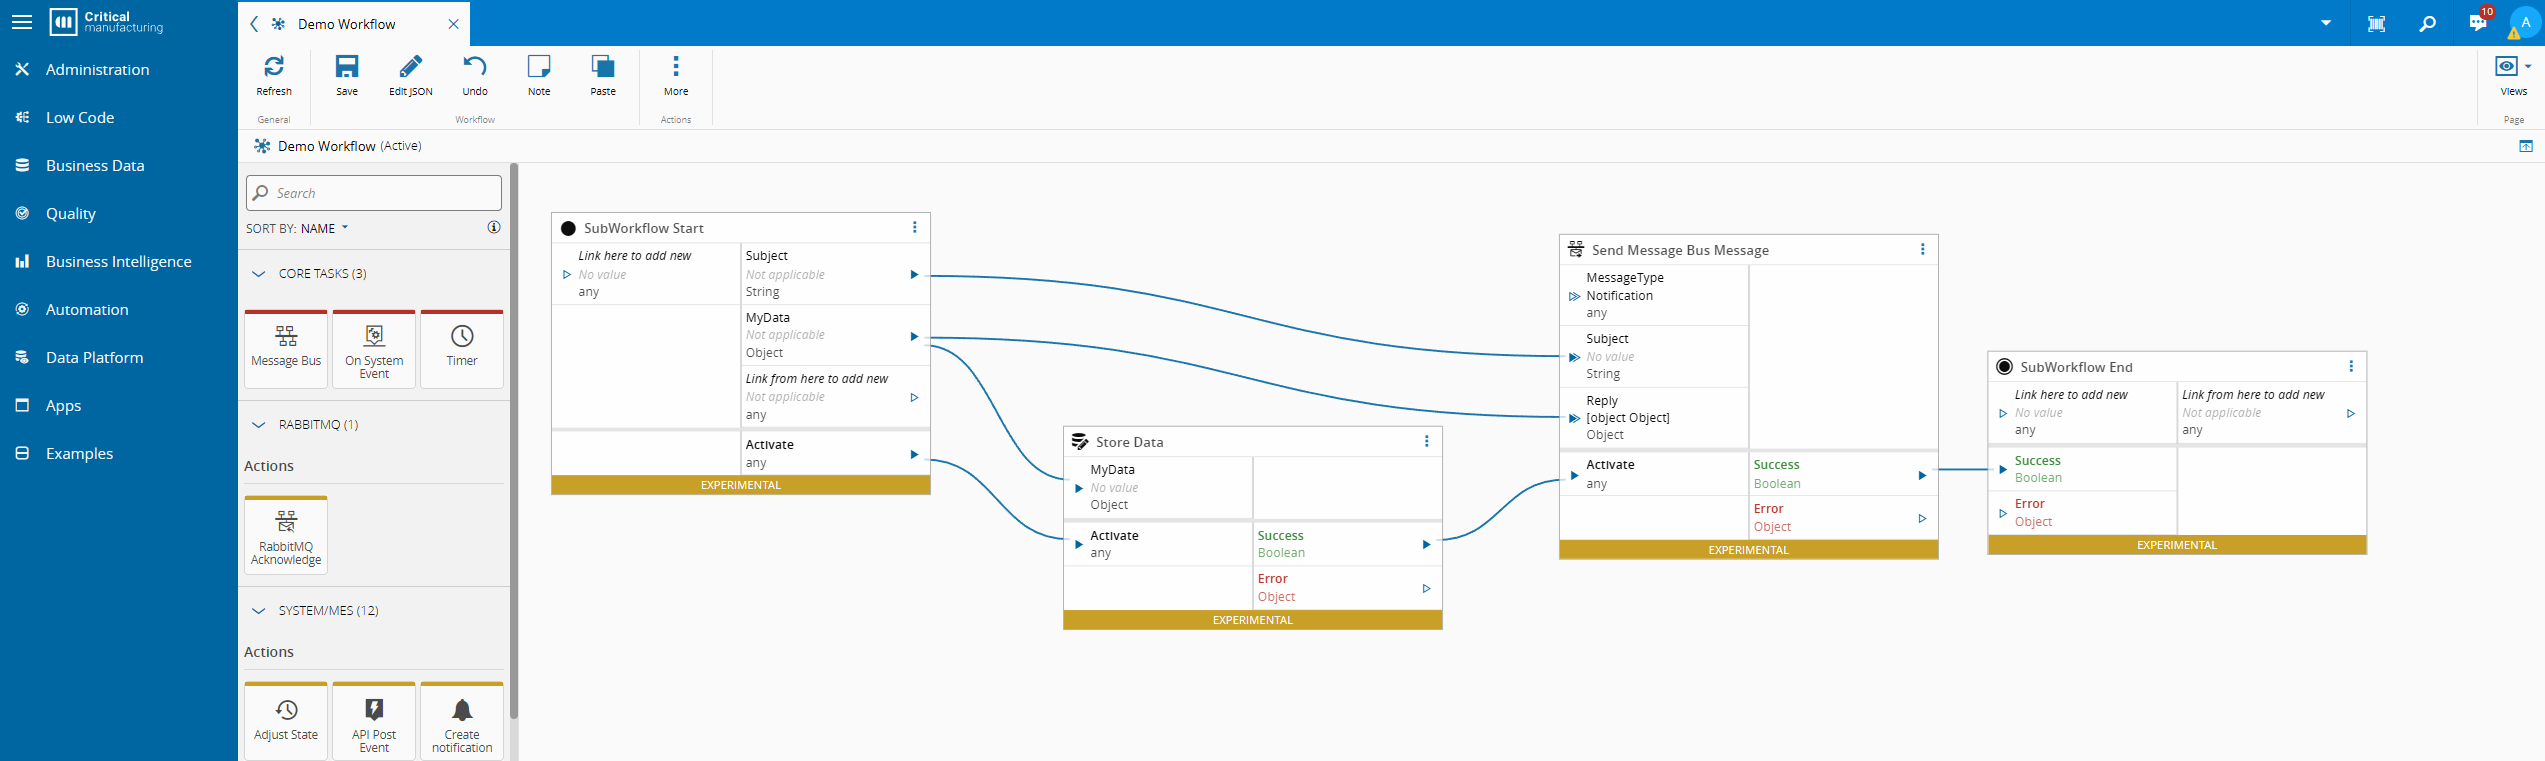
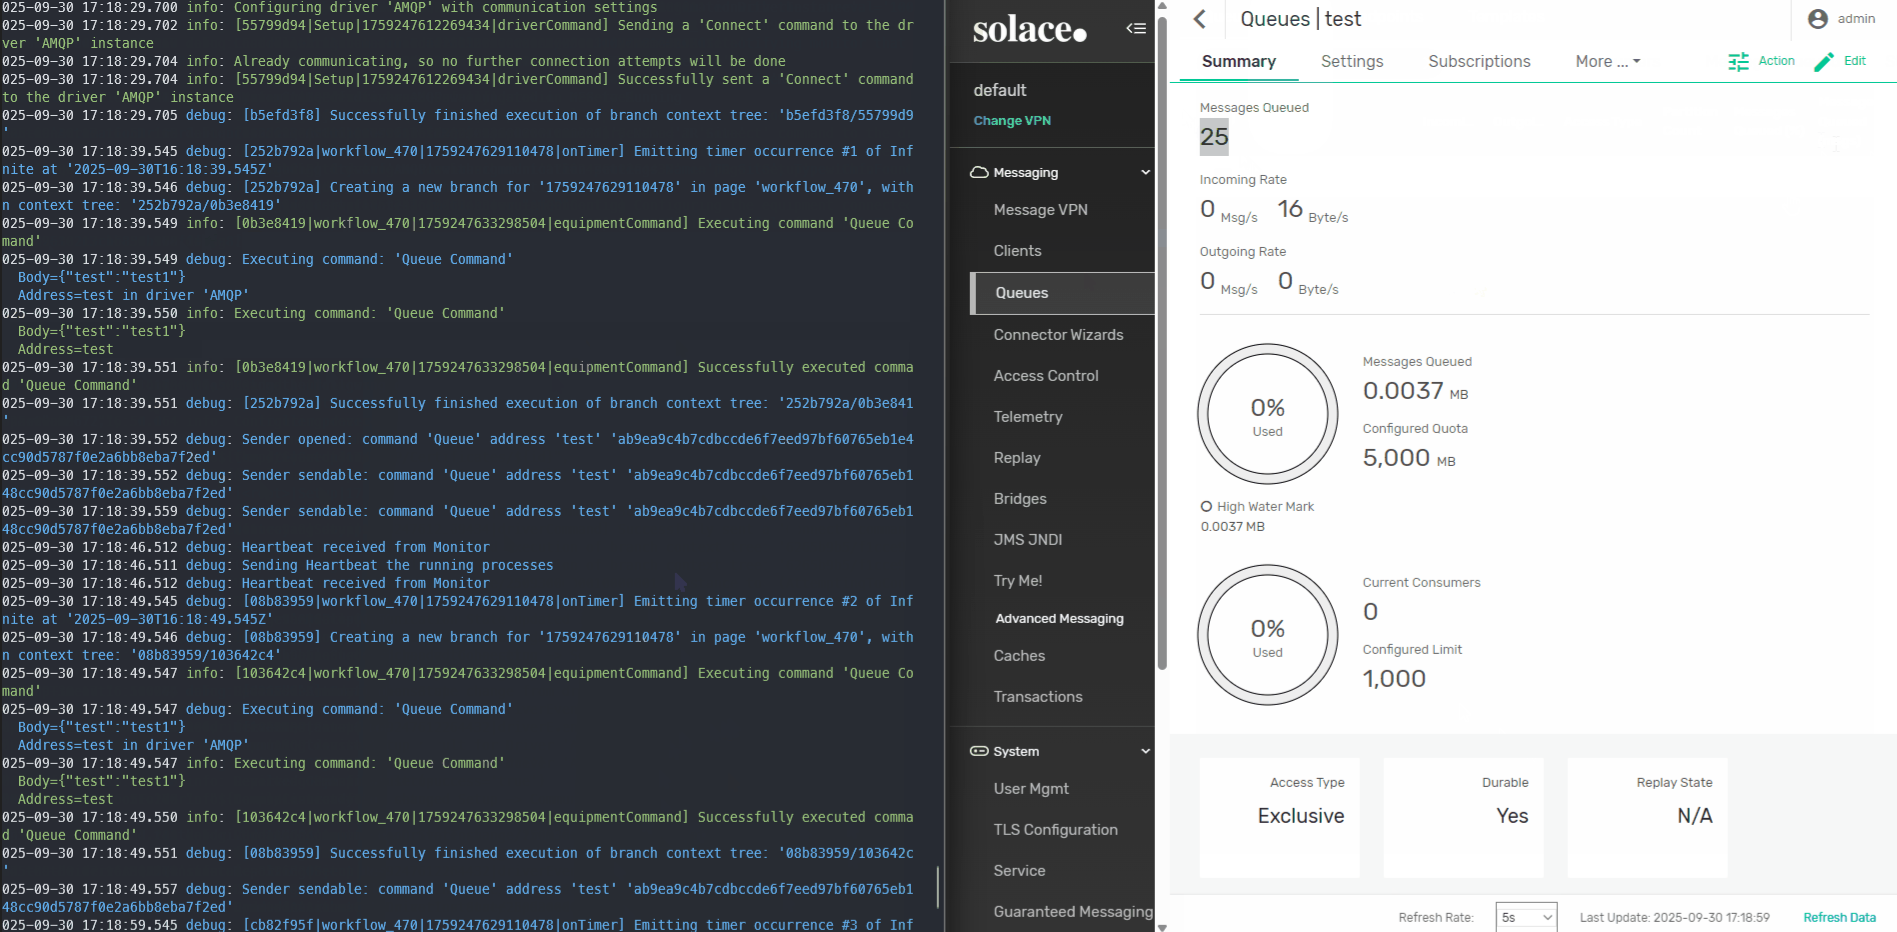
In our Controller, we will have two workflows. The first workflow is the setup workflow, here we will configure the connection to our AMQP driver. The second workflow is very simple, every 10 seconds we will emit a command to post a message to a queue test.
test.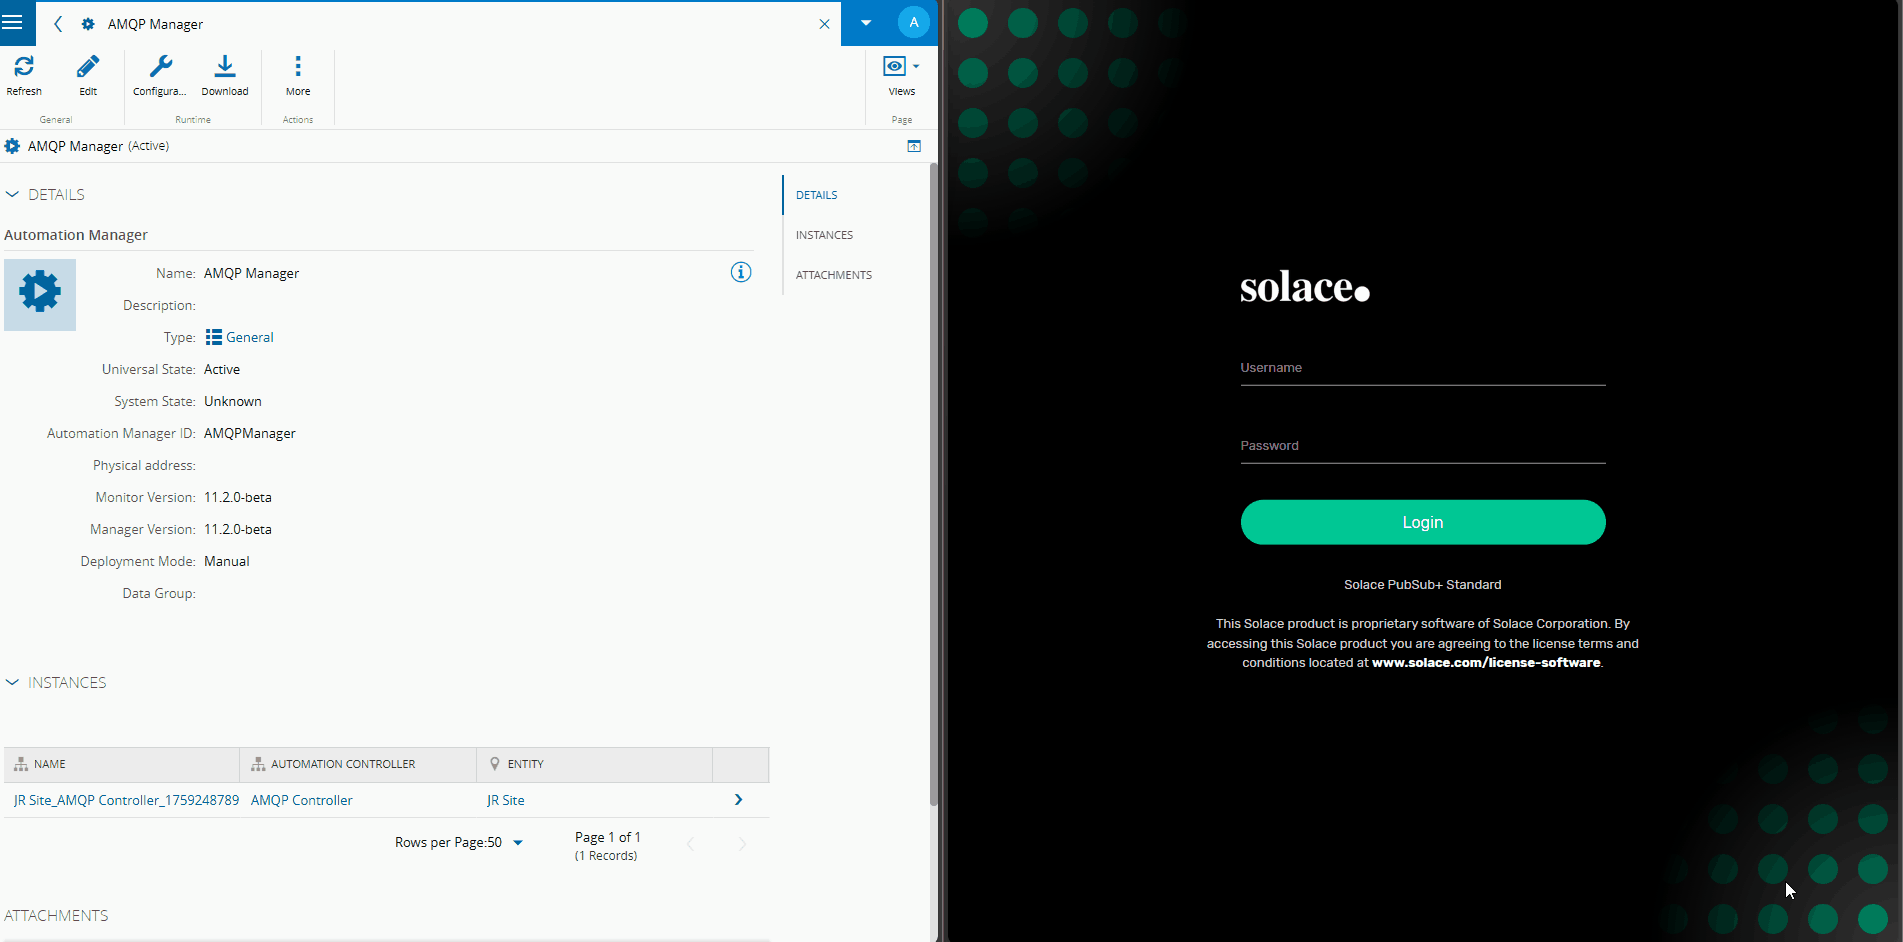
Debugging#
We have now done a start with the automation manager and downloaded the packages. In order to debug we can find more information here. We also go into detail in the MTConnect blog post.
Testing#
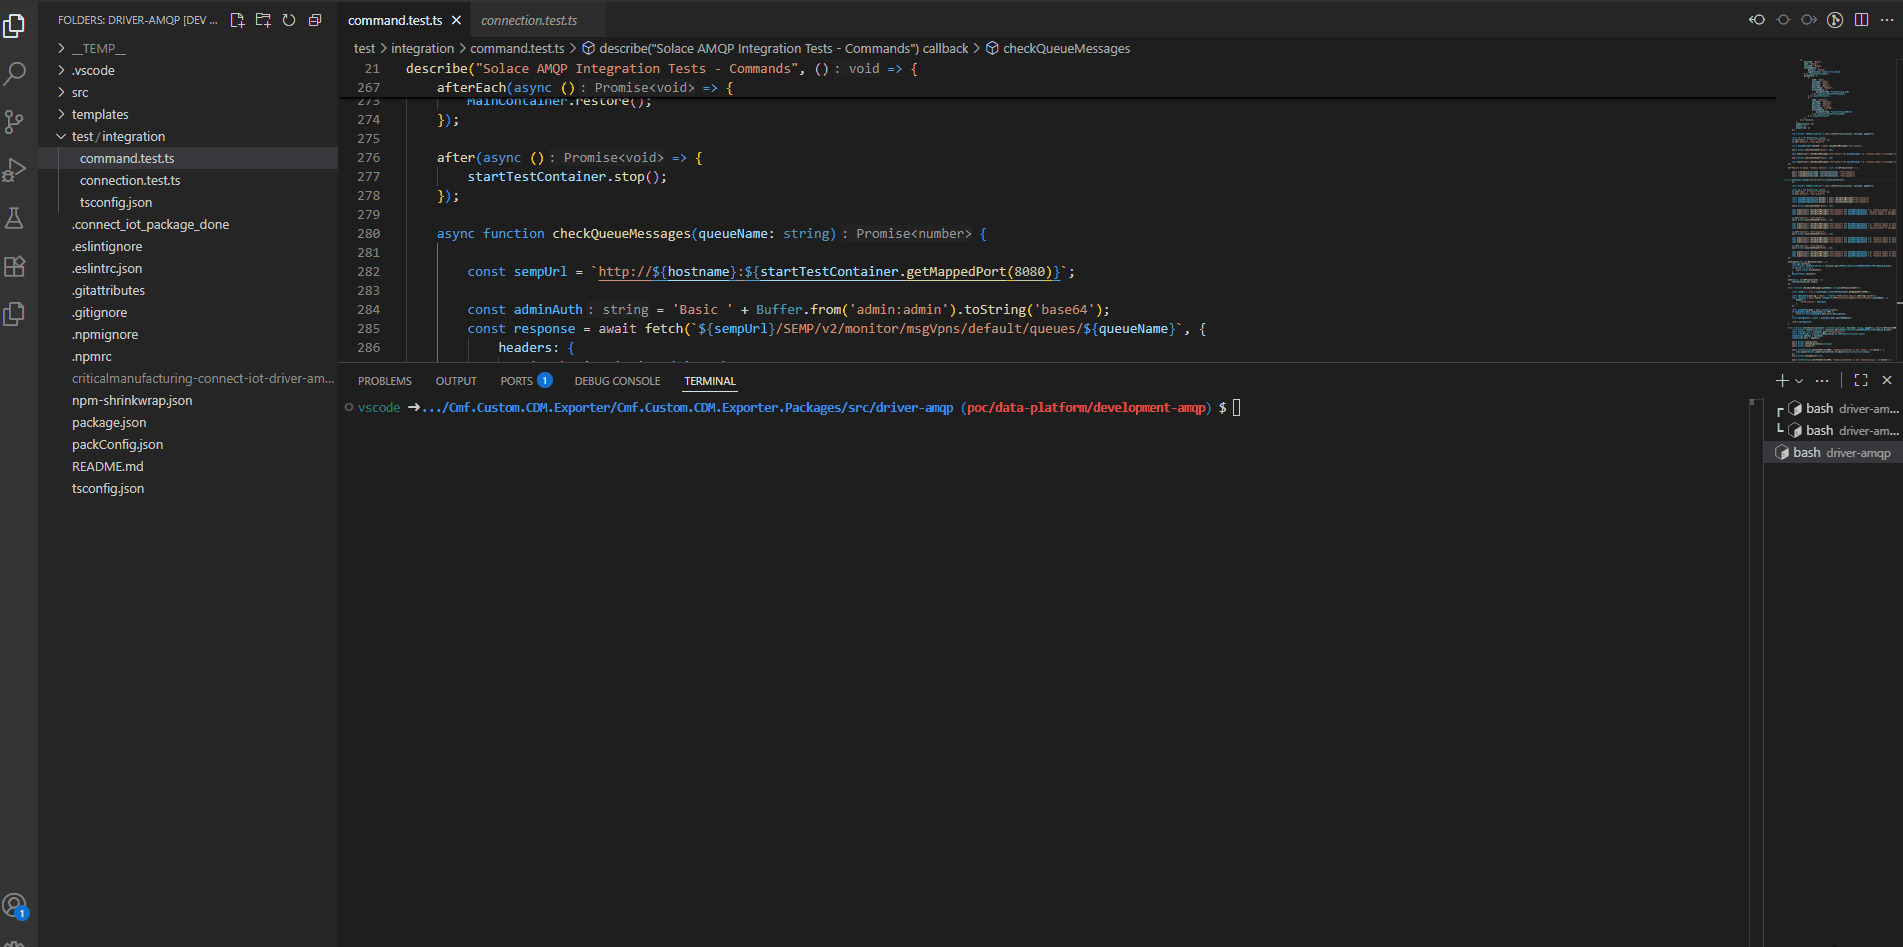
One of the key topics when building any kind of integration is the ability to test. In our MTConnect blog post we focused in using the IoT Test Orchestrator tool. This tool focuses a lot on testing workflows and business logic. When creating drivers it is also helpful to use unit tests and even integration tests. In our example, we would like to create a test that interacts with an AMQP Broker. In order to be able to do this we will use the container that we used for Solace in our tests.
Connection Test#
The first and most basic tests is to test the ability to open a connection to an AMQP broker.
Before creating our test we need to setup our test broker.
In order to do that we will use a tool called testcontainers. Testcontainers is a tool that exists in a lot of platforms and allows the developer to spin up test containers of several different technologies.
For our test we will spin up a Solace container. We will boot up the Solace container and provide it with enough resources to run.
We could also use other containers like rabbitmq:3-alpine, which would be even slimmer.
describe("Command Tests", () => {
  let container: inversify.Container;
  let startTestContainer: StartedTestContainer;
  let amqpPort: number;
  let hostname: string;

  before(async () => {
      hostname = os.hostname();
      startTestContainer = await new GenericContainer("solace/solace-pubsub-standard:latest")
          .withExposedPorts(5672, 8080, 55555) // AMQP, SEMP, SMF
          .withEnvironment({
              "username_admin_globalaccesslevel": "admin",
              "username_admin_password": "admin",
              "system_scaling_maxconnectioncount": "100",  // Lower connection limit for faster boot
              "service_webtransport_enabled": "false",     // Disable web transport service
              "service_mqtt_enabled": "false"             // Disable MQTT if not needed
          })
          // CRITICAL: Solace requires at least 1GB shared memory
          .withSharedMemorySize(1024 * 1024 * 1024) // 1GB in bytes

          // Optional: Resource quotas (not supported in rootless Docker)
          .withResourcesQuota({
              memory: 4, // 2GB memory limit
              cpu: 2     // 2 CPU cores
          })
          .withWaitStrategy(Wait.forListeningPorts())
          .withStartupTimeout(120000) // Solace takes longer to start
          .start();

      amqpPort = startTestContainer.getMappedPort(5672);
  });

...
Before each test we will create all the required dependency injection containers to be able to run.
Here is where we are able to replace the driver “real” DI containers with our test containers.
For this example we can see the Logger, we will replace the system Logger with a mock logger. We can also provide some set of default driver configurations.
beforeEach((done) => {
    MainContainer.snapshot();
    container = new inversify.Container();
    container.parent = MainContainer;

    // in this case, the logger is deeper and must be removed, otherwise the subscription is logging to the console
    if (container.parent && container.parent.parent) {
        container.parent.parent.rebind(COMMON_TYPES.Logger).to(LoggerMock).inSingletonScope();
    }

    container.bind<Logger>(COMMON_TYPES.Logger).to(LoggerMock).inSingletonScope();

    container.parent.bind<string>(DRIVER_TYPES.DriverId).toConstantValue("test-driver-id");
    container.bind<DeviceDriver>(COMMUNICATION_TYPES.Device.Driver).to(AMQPDeviceDriver).inSingletonScope();

    container.bind("Configurations").toConstantValue({
        commands: [],
        communication: {},
        events: [],
        properties: []
    });

    done();
});
Creating a test to connect with Solace. In our test we will retrieve the driver DI container. Retrieve our Solace settings and start our driver boot cycle. Note that after connect the driver awaits from a validation of the setup result, in order to finish the boot cycle.
The goal in our test is to validate that the correct driver states were reached.
it("Connect to Solace", async () => {

  const driver: AMQPDeviceDriver = container.get<AMQPDeviceDriver>(COMMUNICATION_TYPES.Device.Driver);
  const configs: any = container.get("Configurations");
  const comSettings = (configs.communication as AMQPCommunicationSettings);
  comSettings.address = hostname;
  comSettings.port = amqpPort;

  await driver.initialize();
  await driver.setConfigurations(configs);
  await driver.connect();

  await TestUtilities.waitForNoError(2000, "CommunicationState is not 'Setup'", () => {
      chai.expect(driver.communicationState).to.equal(CommunicationState.Setup);
  });
  await driver.setupResult(true);

  await TestUtilities.waitForNoError(2000, "CommunicationState is not 'Communicating'", () => {
      chai.expect(driver.communicationState).to.equal(CommunicationState.Communicating);
  });
});
Let’s see now a similar test but with basic auth.
Note that the test is very similar, but now we add to differences.
The first is we create a user in Solace, the second is that we now pass on a username and a password in or driver communication settings.
it("Connect to Solace Basic Auth - Happy Path", async () => {
    await createUserInSolace(startTestContainer, hostname);

    container.rebind("Configurations").toConstantValue({
        commands: [],
        communication: {
            "username": "testuser",
            "password": "testpass123"
        },
        events: [],
        properties: []
    });

    const driver: AMQPDeviceDriver = container.get<AMQPDeviceDriver>(COMMUNICATION_TYPES.Device.Driver);
    const configs: any = container.get("Configurations");
    const comSettings = (configs.communication as AMQPCommunicationSettings);
    comSettings.address = hostname;
    comSettings.port = amqpPort;

    await driver.initialize();
    await driver.setConfigurations(configs);
    await driver.connect();

    await TestUtilities.waitForNoError(2000, "CommunicationState is not 'Setup'", () => {
        chai.expect(driver.communicationState).to.equal(CommunicationState.Setup);
    });
    await driver.setupResult(true);

    await TestUtilities.waitForNoError(2000, "CommunicationState is not 'Communicating'", () => {
        chai.expect(driver.communicationState).to.equal(CommunicationState.Communicating);
    });
});
Our Solace container behaves like a normal Solace instance. We can interact with it via its API.
async function createUserInSolace(startTestContainer: StartedTestContainer, hostname: string) {
    const sempPort = startTestContainer.getMappedPort(8080);
    const sempUrl = `http://${hostname}:${sempPort}`;
    const adminAuth = 'Basic ' + Buffer.from('admin:admin').toString('base64');

    // 1. Create the client user
    let result = await fetch(`${sempUrl}/SEMP/v2/config/msgVpns/default/clientUsernames`, {
        method: 'POST',
        headers: {
            'Content-Type': 'application/json',
            'Authorization': adminAuth
        },
        body: JSON.stringify({
            clientUsername: 'testuser',
            password: 'testpass123',
            enabled: true
        })
    });

    // 2. Enable basic authentication on the message VPN
    result = await fetch(`${sempUrl}/SEMP/v2/config/msgVpns/default`, {
        method: 'PATCH',
        headers: {
            'Content-Type': 'application/json',
            'Authorization': adminAuth
        },
        body: JSON.stringify({
            authenticationBasicEnabled: true,
            authenticationBasicType: "internal"
        })
    });
}
Command Test#
After validating the ability to connect to an AMQP Broker, we can now test publishing to the broker.
The first thing we do is we create a queue in Solace. Then we provide to the driver configurations the information about the command we want to execute. We will have a command called Queue, with a single command parameter Body. The command will specify a queue address test-queue and the capability - Queue. The parameter type will inform the driver of how to interpret the parameter, in this case it is Body, so the driver will use it as the message payload.
The start driver will handle the communication start of the driver.
The checkQueueMessages will retrieve the number of messages the queue has received. For this test we are just validating the message was sent and received, we could also create a subscriber for this queue that would receive the message being broadcast.
Finally, we create a dummy command, this would be analogous as in the workflow providing a input values to our task Execute Equipment Command and call the driver executeCommand with the matching name of the command in the driver definition.
it("Publish to Queue", async () => {

    await createQueue(hostname, startTestContainer);

    container.rebind("Configurations").toConstantValue({
        commands: [
            ({
                deviceId: "Queue",
                name: "Queue",
                systemId: "Queue",
                extendedData: {
                    address: "test-queue",
                    capabilities: Capabilities.Queue
                } as CommandExtendedData,
                parameters: [{
                    name: "body",
                    systemId: "body",
                    deviceId: "body",
                    dataType: "Object",
                    deviceType: "Object",
                    extendedData: {
                        parameterType: ParameterType.Body
                    } as CommandParameterExtendedData
                } as CommandParameter],
            } as Command),
        ],
        communication: {},
        events: [],
        properties: []
    });

    const driver: AMQPDeviceDriver = await startDriver(container, hostname, amqpPort);

    const queueMessages = await checkQueueMessages("test-queue");
    const cp = new Map<string, any>();
    cp.set("body", { "test": "test123" });

    await driver.executeCommand("Queue", cp);

    chai.expect(await checkQueueMessages("test-queue") === queueMessages + 1, "Invalid number of messages");

    await driver.executeCommand("Queue", cp);

    chai.expect(await checkQueueMessages("test-queue") === queueMessages + 2, "Invalid number of messages");
});
As mentioned, the start driver is a helper method that will handle the startup of the communication, that can be used in all our tests.
async function startDriver(container: inversify.Container, hostname: string, amqpPort: number) {
    const driver: AMQPDeviceDriver = container.get<AMQPDeviceDriver>(COMMUNICATION_TYPES.Device.Driver);
    const configs: any = container.get("Configurations");
    const comSettings = (configs.communication as AMQPCommunicationSettings);
    comSettings.address = hostname;
    comSettings.port = amqpPort;

    await driver.initialize();
    await driver.setConfigurations(configs);
    await driver.connect();

    await TestUtilities.waitForNoError(2000, "CommunicationState is not 'Setup'", () => {
        chai.expect(driver.communicationState).to.equal(CommunicationState.Setup);
    });
    await driver.setupResult(true);

    await TestUtilities.waitForNoError(2000, "CommunicationState is not 'Communicating'", () => {
        chai.expect(driver.communicationState).to.equal(CommunicationState.Communicating);
    });
    return driver;
}
The createQueue and checkQueueMessages, will query the Solace API to either create a Queue or to retrieve metadata from that Queue.
async function createQueue(hostname: string, startTestContainer: StartedTestContainer, queueName: string = 'test-queue') {
    const sempUrl = `http://${hostname}:${startTestContainer.getMappedPort(8080)}`;
    const adminAuth = 'Basic ' + Buffer.from('admin:admin').toString('base64');

    await fetch(`${sempUrl}/SEMP/v2/config/msgVpns/default/queues`, {
        method: 'POST',
        headers: {
            'Content-Type': 'application/json',
            'Authorization': adminAuth
        },
        body: JSON.stringify({
            queueName,
            accessType: 'exclusive',
            permission: 'consume',
            ingressEnabled: true,
            egressEnabled: true
        })
    });
}
async function checkQueueMessages(queueName: string) {

    const sempUrl = `http://${hostname}:${startTestContainer.getMappedPort(8080)}`;

    const adminAuth = 'Basic ' + Buffer.from('admin:admin').toString('base64');
    const response = await fetch(`${sempUrl}/SEMP/v2/monitor/msgVpns/default/queues/${queueName}`, {
        headers: {
            'Authorization': adminAuth
        }
    });

    const queueData = await response.json();
    if (queueData.meta.responseCode == 400) {
        throw new Error(queueData.meta.error.description);
    }
    const messageCount: number = queueData.data.spooledMsgCount;

    return messageCount;
}
Seeing it Run#
In order to run our tests we can simply run npm run test. This will invoke all our configured tests and output the results.
We can also generate a coverage report by running npm run test:cover. It also generates an html report where we can see all lines traversed by our testing and the one’s we are still missing.
Final Thoughts#
In this use case we can see how with some simple methods we have created a driver interface for an AMQP publisher.