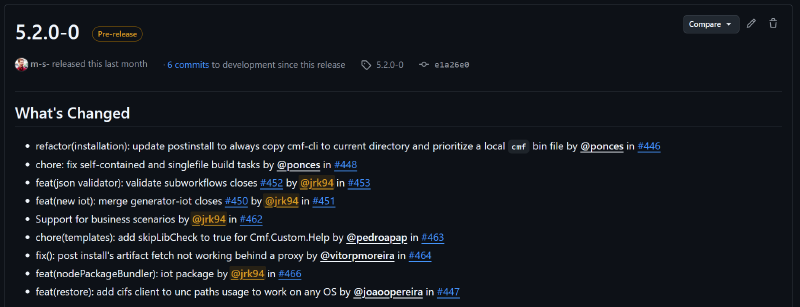
For this post I want to discuss how Connect IoT was changed by version v5.2.0 of the CM CLI.
Brief History - for the Old People like me#
In the Beginning, there was one generator (Connect IoT project scaffolding).
Actually they were kind of done in parallel, so in the Beginning there was one generator and one framework.
And there was harmony throughout the land…
In fact, we were always a bit discontent with this solution. What was happening was that the CLI generated a customization project for Connect IoT, but all the components of Connect IoT were then managed with the generator-iot. This was a bit unintuitive for the user because he had to jump across tooling. Nevertheless, there were little changes from v6 of the MES to v9, regarding scaffolding of IoT. So everyone was kind of used to this solution.
Even though the CLI itself was always able to scaffold without the need of any other tool.
The first chink#
The generator-iot was fully based on yeoman and yeoman I think from 4.5 (don’t quote me on this), introduced changes that kind of made it that we had to do a revamp of the tool.
But, alas we procrastinated.
The second chink#
With the move to Angular 15 we no longer could just side load our components and had to conform to being a bizarre hybrid between an angular workspace and a nodejs one.
A new scaffolding tool was born ngx-schematics.
Final straw#
We moved to linux and we kept finding that yeoman was always giving us annoying issues with permissions for directories. Yes, it can be that we are noobs, but we tried fixing it and it was flaky at best.
Alas procrastination was no more.
With the creation and release of Automation Task Libraries (an angular free way to define Connect IoT Tasks) we no longer needed the new scaffolding tool and honestly we were a bit fed up with managing three tools so we took the effort to finally migrate everything to the CLI.
Unified Generator#
All components of Connect IoT are customizable.
If you want a new task, converter or even a new driver. There’s no difference between what would be called customization and how CM develops internally. Throughout the years this has been awesome and has allowed for a great deal of cross-pollination between what are projects and what is then turned into the core product and vice-versa.
Creating a new IoT Package in 5.2.0#
Let’s do an example, I want to create an IoT package with one task and one converter. Should be pretty simple.
First, I will create my iot customization package:
cmf new iot
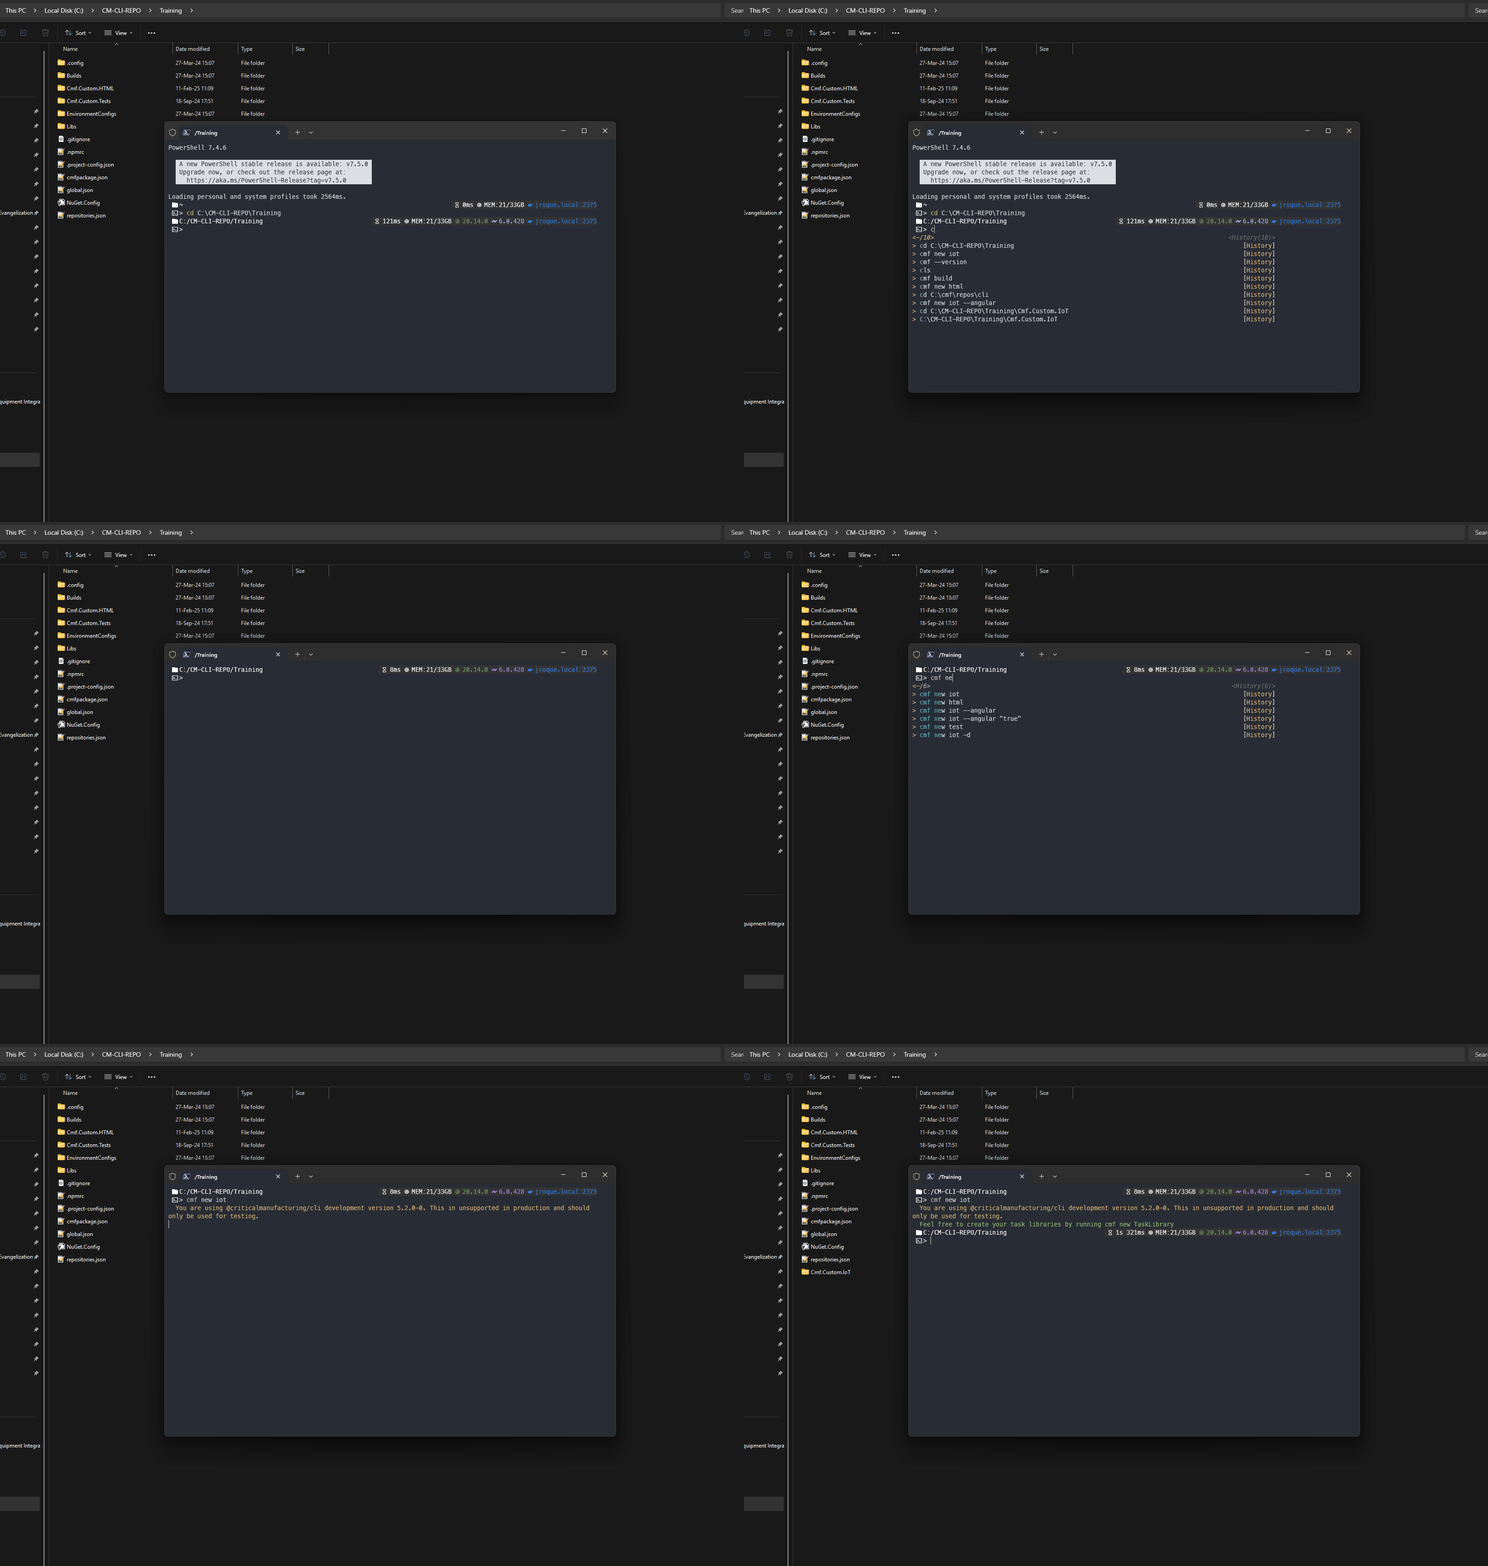
This commands creates my iot workspace, it has a package for master data and a package for iot customization.
For the master data part, nothing has changed, so I will delete that. In order to delete dependencies I can simply go to the cmfpackage.json of my root package and remove that dependency:
Scaffolded cmfpackage.json:
{
  "packageId": "Cmf.Custom.IoT",
  "version": "1.0.0",
  "description": "Cmf Custom cmf Cmf.Custom.IoT Package",
  "packageType": "Root",
  "isInstallable": true,
  "isUniqueInstall": false,
  "dependencies": [
    {
      "id": "Cmf.Environment",
      "version": "11.1.0",
      "mandatory": false
    },
    {
      "id": "Cmf.Custom.IoT.Packages",
      "version": "1.0.0"
    },
    {
      "id": "Cmf.Custom.IoT.Data",
      "version": "1.0.0"
    }
  ]
}
Removing what I don’t need:
{
  "packageId": "Cmf.Custom.IoT",
  "version": "1.0.0",
  "description": "Cmf Custom cmf Cmf.Custom.IoT Package",
  "packageType": "Root",
  "isInstallable": true,
  "isUniqueInstall": false,
  "dependencies": [
    {
      "id": "Cmf.Environment",
      "version": "11.1.0",
      "mandatory": false
    },
    {
      "id": "Cmf.Custom.IoT.Packages",
      "version": "1.0.0"
    }
  ]
}
Creating a new IoT Task Library#
A IoT customization package can hold several Connect IoT Package (npm packages). For this example, I will use only one, but there’s no limitation on this. It’s is common to have multiple packages, some with tasks, others with drivers, etc. The packages should hold things that make sense together and should not be generic agglomerations.
In the IoT Package run:
cmf new iot taskLibrary
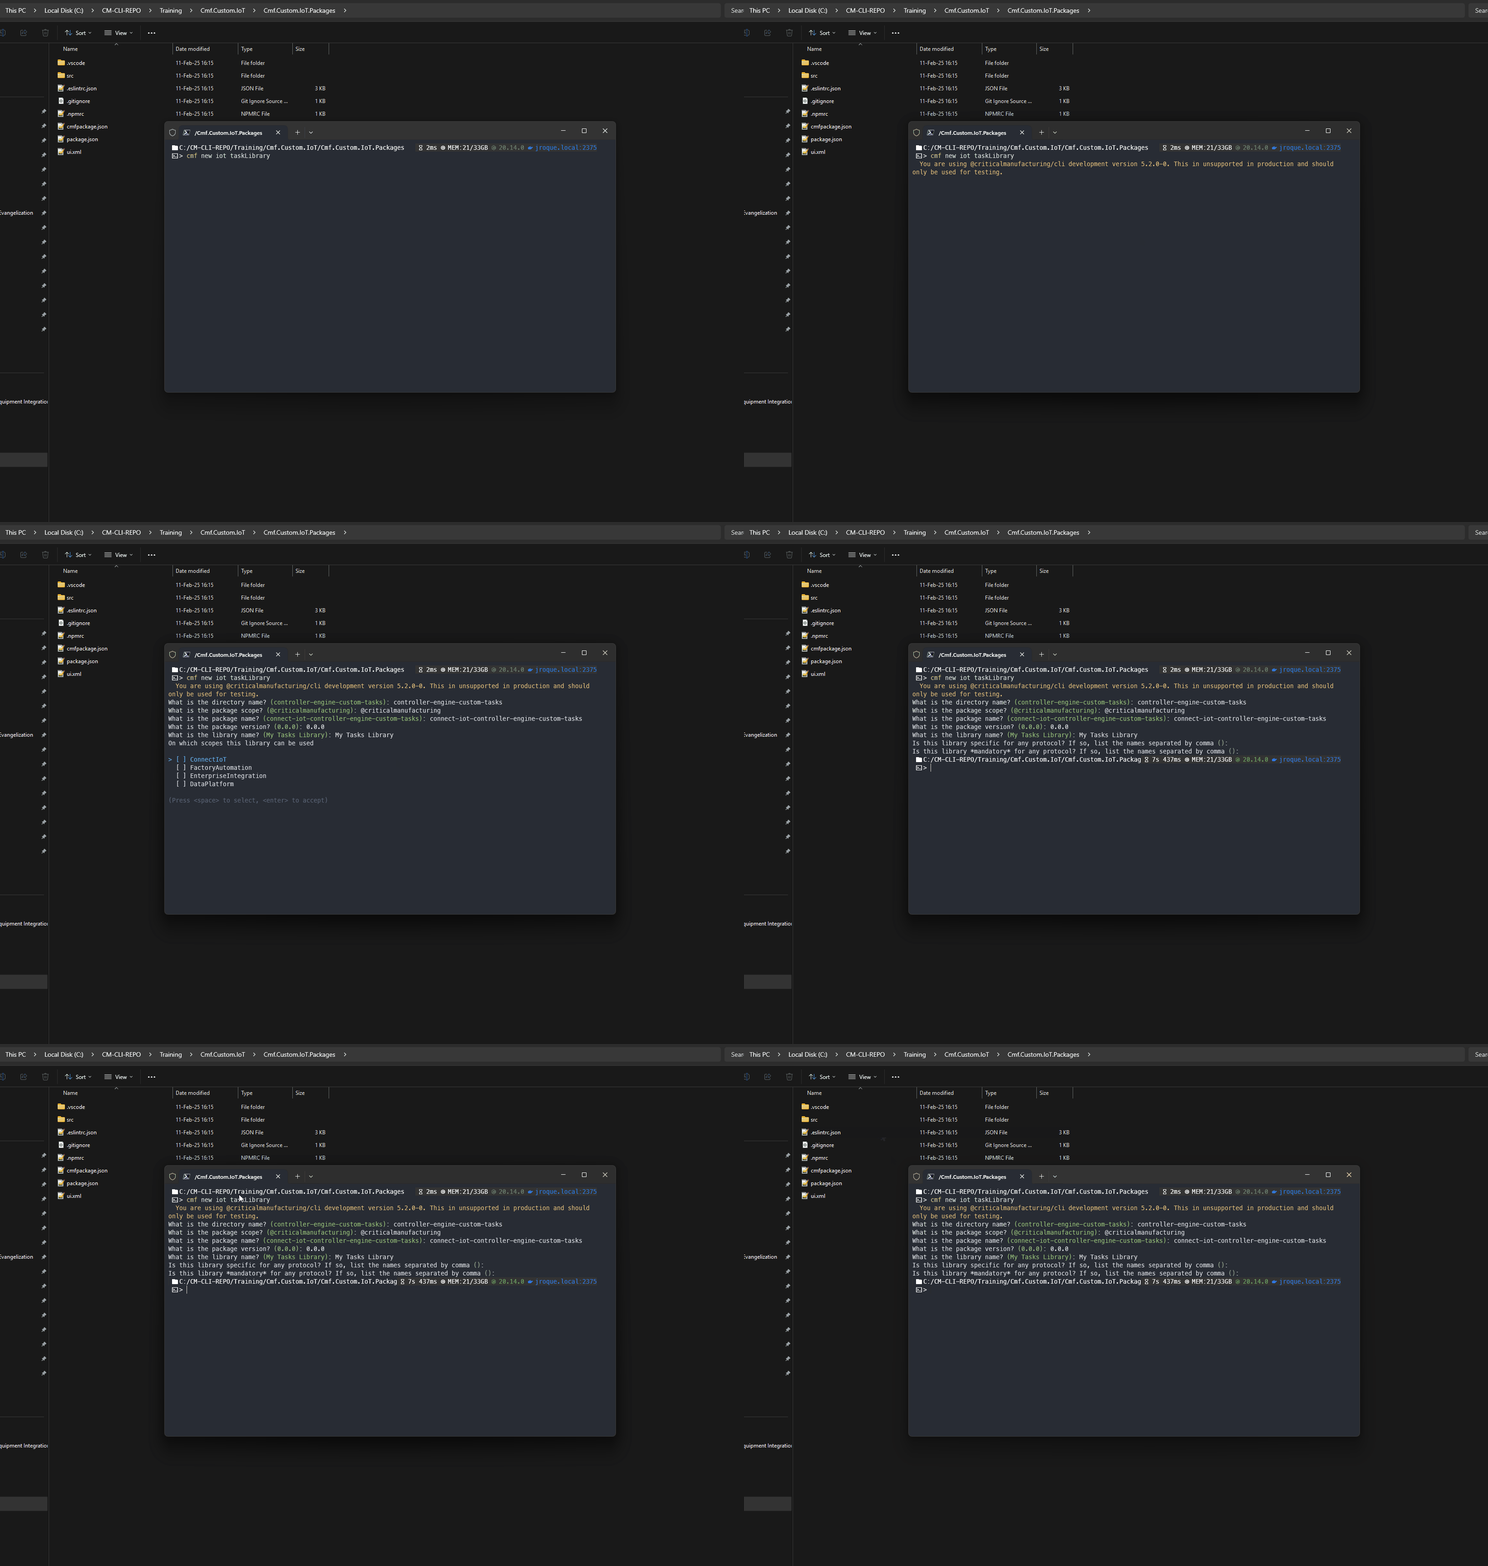
Remember that tasks and converters are grouped inside a task library.
Creating a new IoT Task#
Inside my task library, I can now generate components. Let’s start with a task.
cmf new iot task
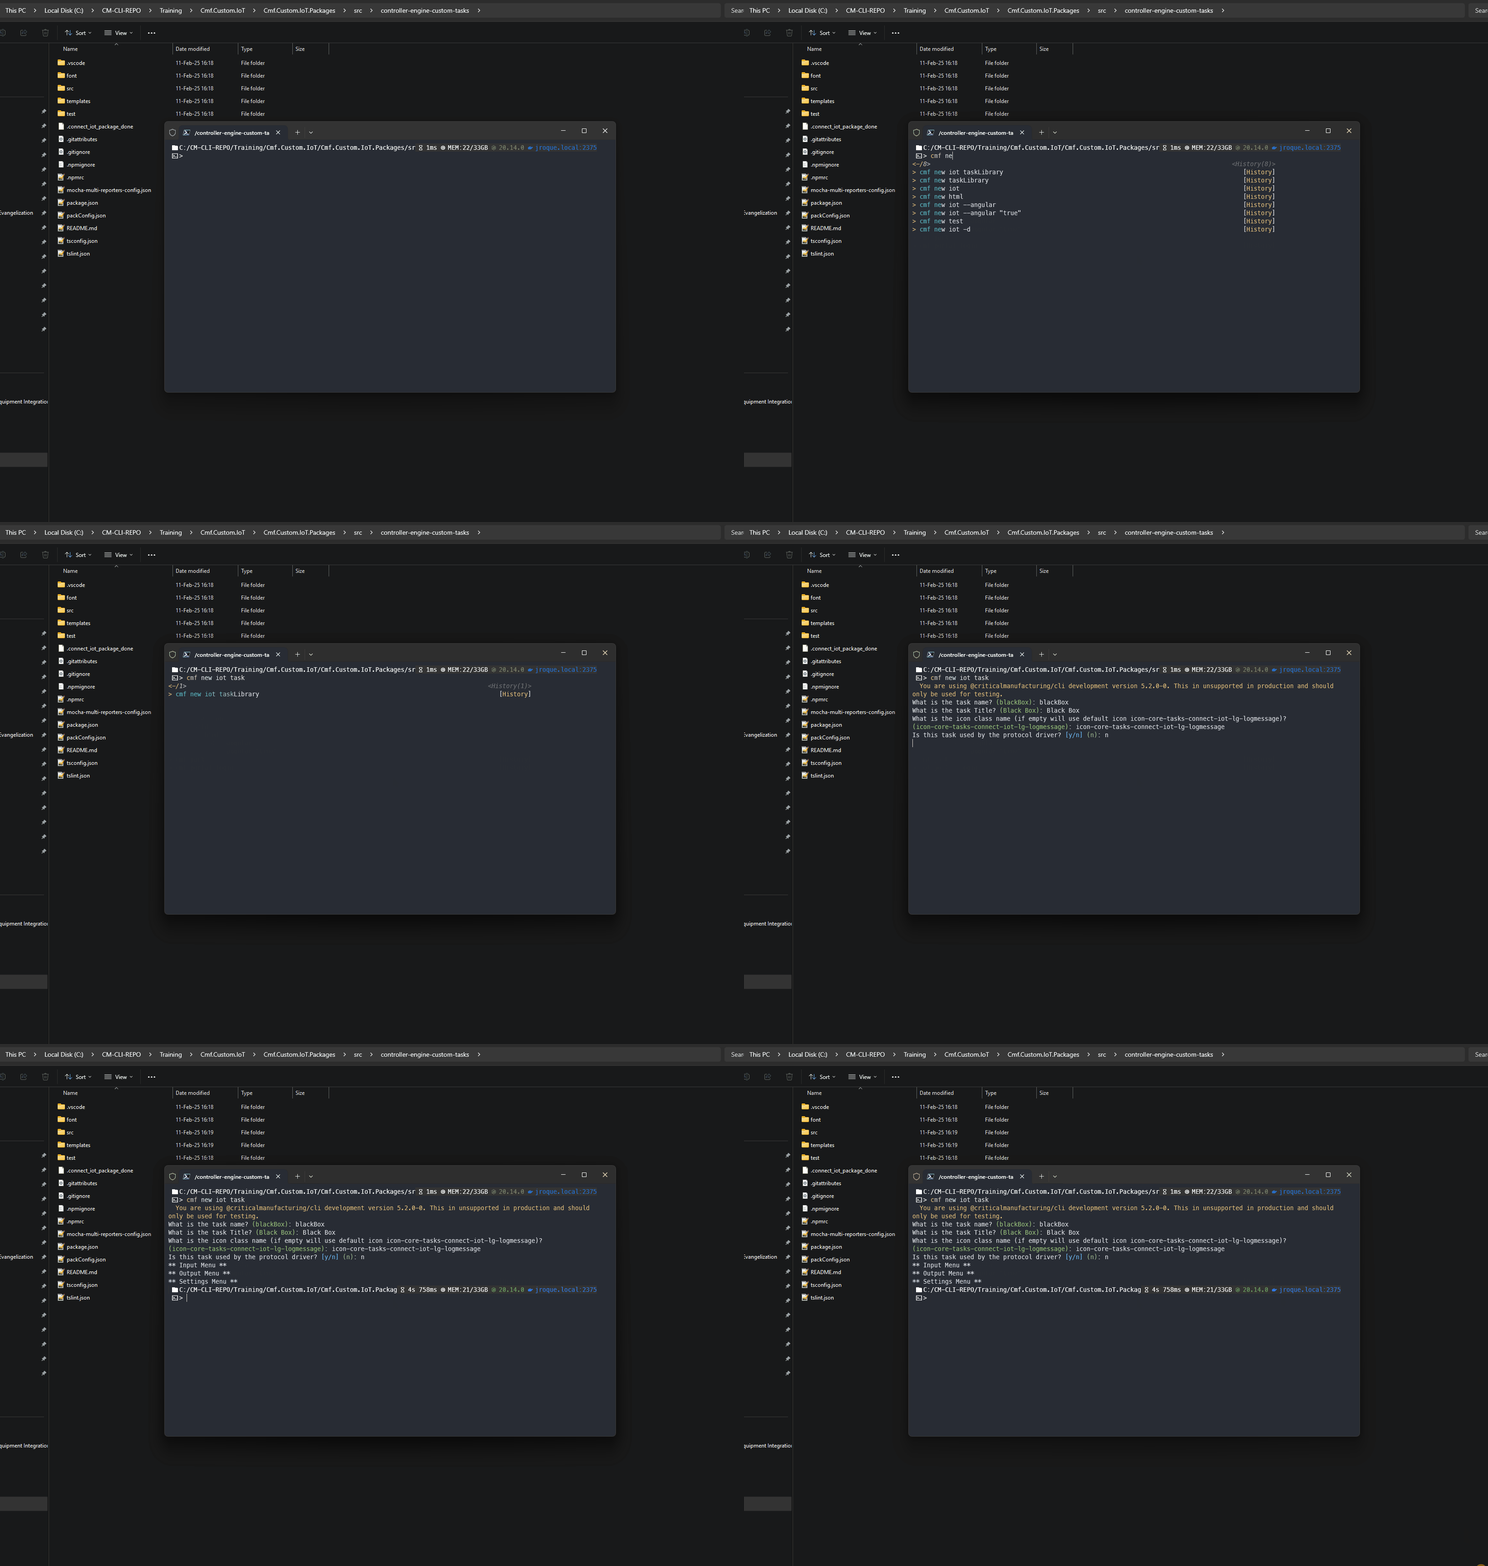
Creating a new IoT Converter#
Inside my task library. Let’s create a converter.
cmf new iot converter
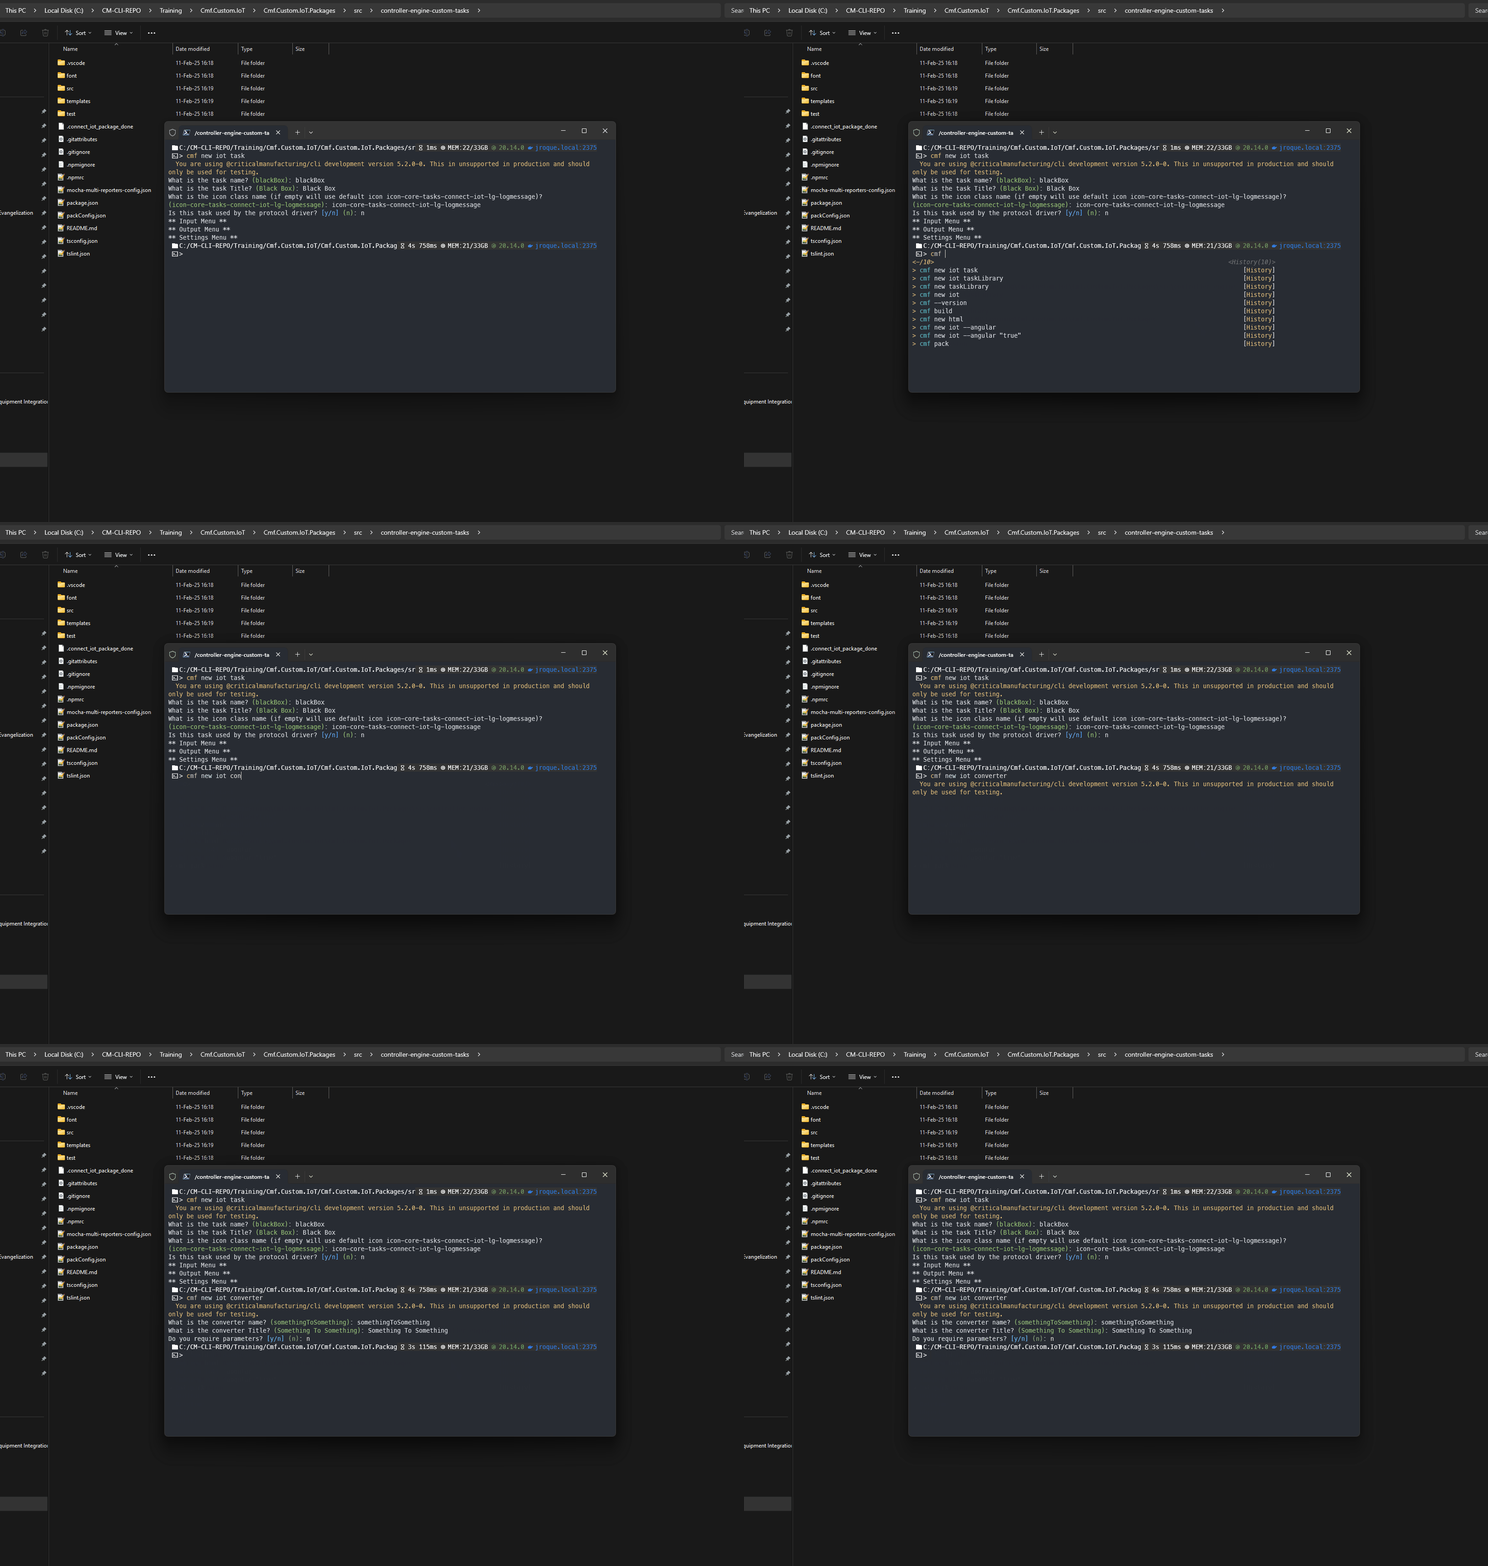
So we now have a task library, with a basic task and converter.
Deploying to a Development System#
For development, we can be a bit more lax. Let’s see how we can use what we have generated to deploy it to a development MES system.
cmf pack of the iot package and by performing an MES installation of that package. This mechanism is the only way to ensure that what is deployed is according to what was committed and tested and to guarantee that there are no package version collisions.Building#
Like any other CM CLI customization package, in order to prepare the package, just run:
cmf build
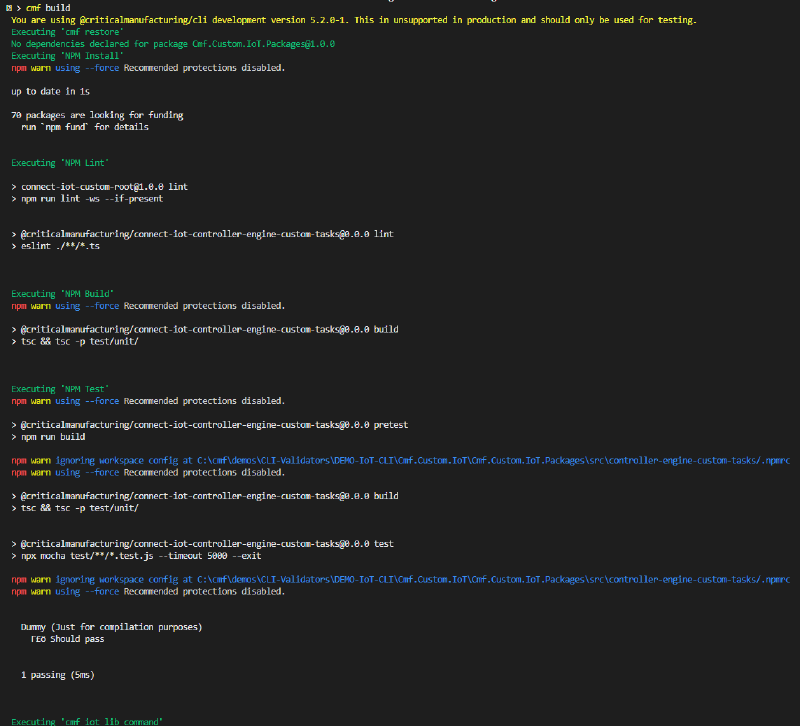
Notice that there’s a lot of thing happening from an npm install to a linter to npm build and npm test. This lifecycle can be manually run when you are developing. All of these commands are present in a set of package.json scripts:
"scripts": {
  "build": "tsc && tsc -p test/unit/",
  "build:test:cover": "npm run build && npm run test:cover",
  "lint": "eslint ./**/*.ts",
  "lint:fix": "eslint ./**/*.ts --fix",
  "watchPackage": "tsc --preserveWatchOutput -w",
  "watchTests": "tsc -p test/unit --preserveWatchOutput -w",
  "test": "npx mocha test/**/*.test.js --timeout 5000 --exit",
  "test:cover": "npx nyc -r cobertura -r lcov -r text-summary mocha test/*.test.js test/**/*.test.js -- --timeout 10000 --exit -R mocha-multi-reporters --reporter-options configFile=mocha-multi-reporters-config.json",
  "pretest": "npm run build",
  "watch": "npm run build -- -w | npx mocha --timeout 10000 --exit --reporter min -w test/*.test.js test/**/*.test.js",
  "generateTask": "cmf new iot task",
  "generateConverter": "cmf new iot converter",
  "packagePacker": "packageBundler -d -o=."
}
Looking at the scripts, there are six subsets of commands:
- build commands
- build - builds the source code
- build:test:cover - builds the source code and runs tests with coverage
- lint commands
- lint - runs a linter validation in the code
- lint:fix - runs a linter validation and fixes what can be fixed
- test commands
- test - run tests
- test:cover - run tests with coverage
- watcher commands
- watchPackage - a watcher on the source code that is always compiling the source code
- watchTests - a watcher on the source code and tests that is always compiling the source code
- generator commands
- generatorTasks - generates a new task
- generateConverter - generates a new converter
- bundler
- packagePacker - creates a connect iot package
Packing#
We have already a task and converter built. So let’s generate a package. We can run cmf pack in the root and this will generate an iot customization package that is installable by the MES. For development purposes this is a bit cumbersome. We can also just run the command to bundle the library npm run packagePacker.
Running this command will generate a tgz file.
Deploying to the MES#
The MES has a section focused on Connect IoT deployments. The Automation Repository page. In this page we can see all the packages that have deployed and we can add more. This is very helpful when you are continuously creating new versions or overriding existing versions.
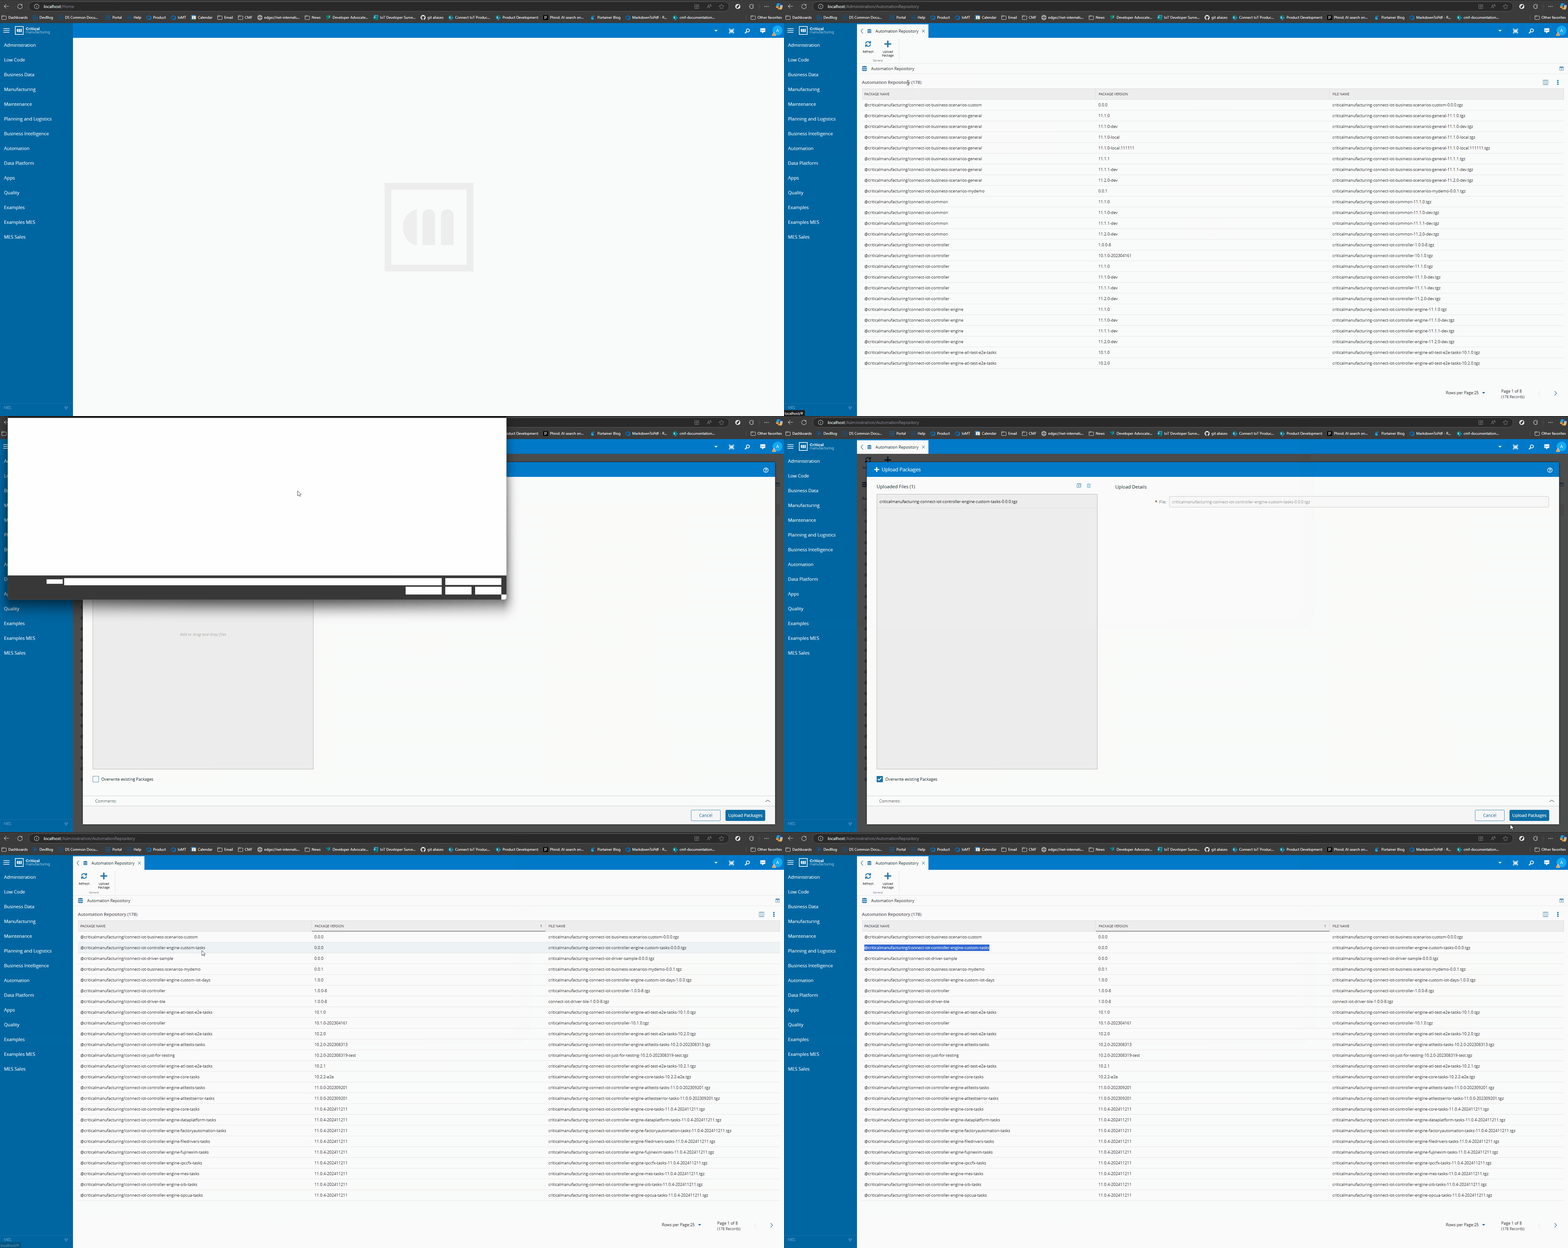
Now the system knows the package. This package has tasks and converters, so let’s add the Automation Task Libraries so we can see those components in the ui.
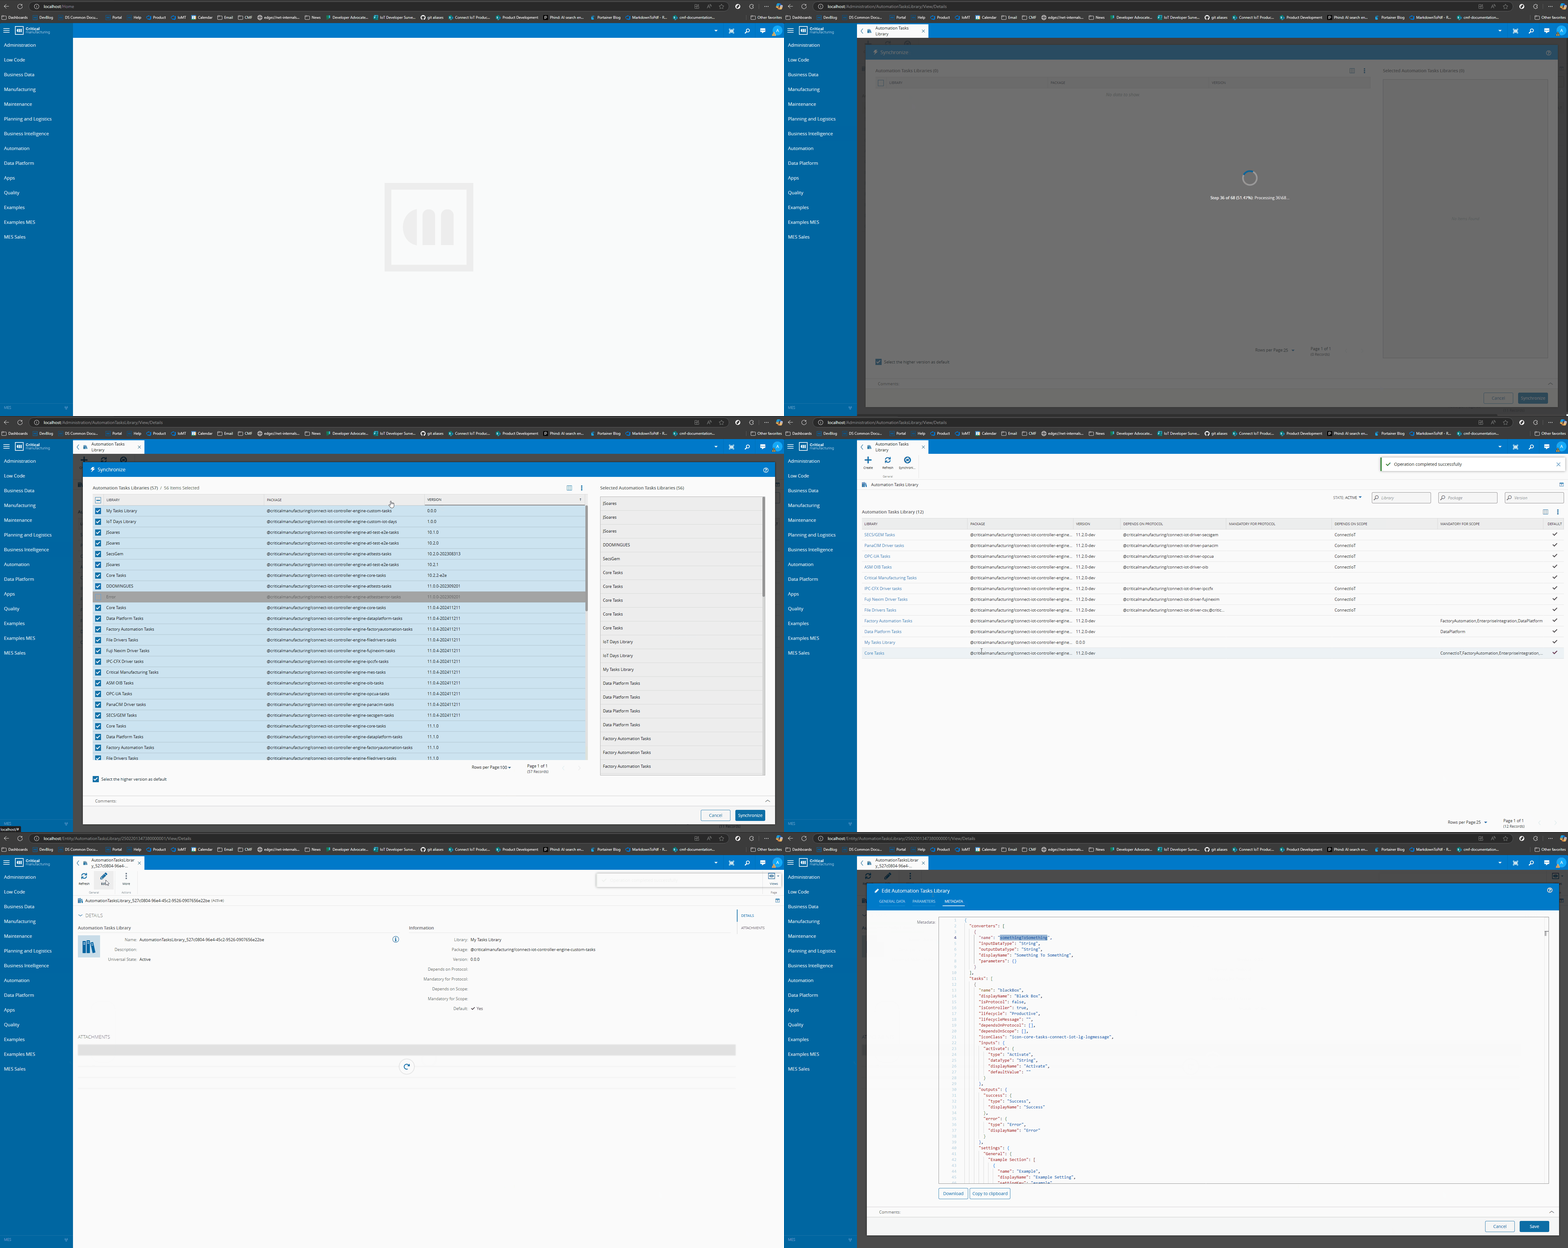
Adding to our Workflow#
The customization package is now ready to use. We can create an Automation Controller and use our tasks.
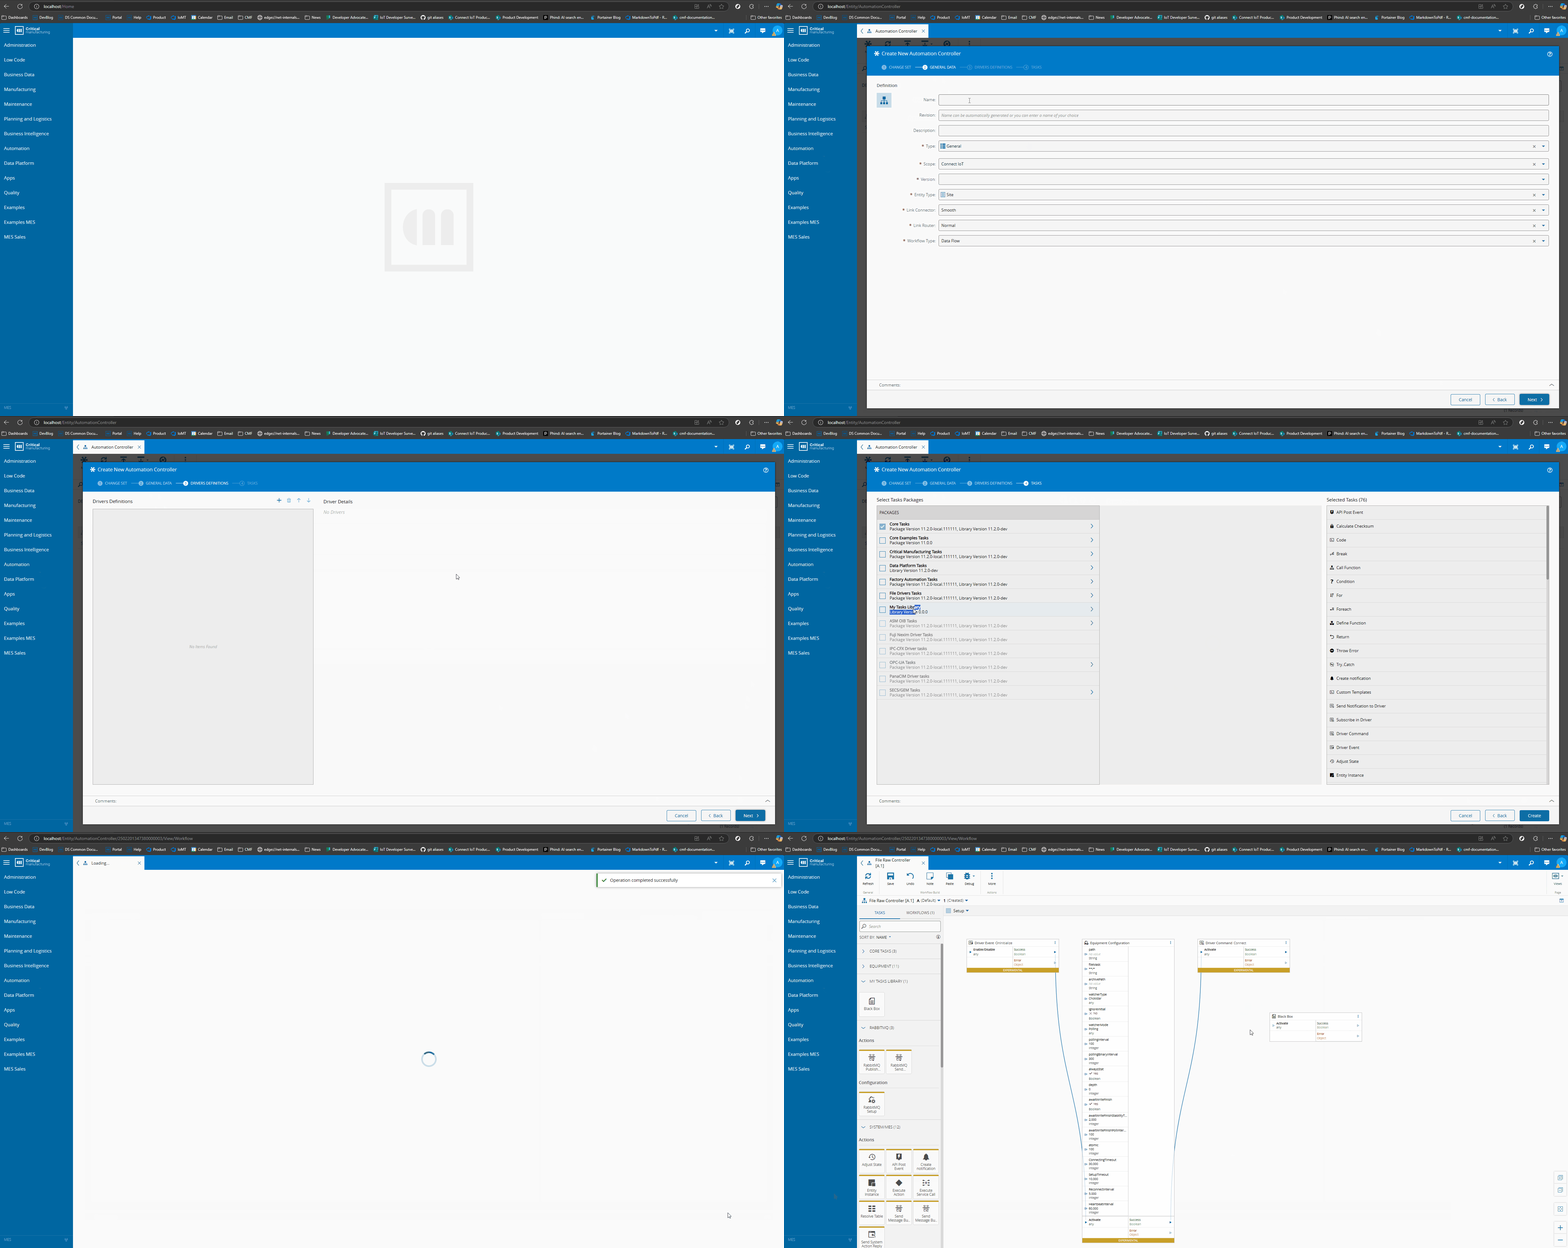
Notice that right away we see our package My Tasks and we can select and it to our controller. Packages can be scoped and only appear for a particular type of Controller.
Recap#
Version 5.2.0 brings a whole new way of creating customization for Connect IoT. This was a very simple of example of how with a simple set of commands you can generate all you need to start happy coding 🧑💻. Now in an even more intuitive and integrated way.
Thank you for reading !!!


